Showing posts with label interior decorating. Show all posts

Tuesday, May 3, 2016

I'm a Fan!

With our house still in disarray (read: we’re a blow-up mattress away from glorified camping) and while we’re stuck in this waiting phase of the renovation – we’re turning our attention to what can get accomplished during the downtime. So while all the chaos happens below our feet, things are looking up! 

Today we’re talking ceiling fans!

One of the more offensive fixtures in our home was this ugly and outdated ceiling fan:


Not to mention yellowed and discolored...


Sure, it was operational but it definitely wasn’t our aesthetic and during our initial walk-through of the house, it was at the very top of the list of things that had to go because…well…I hate ceiling fans. #truthbetold

But! In the 2 months that we’ve lived here, we’ve used it nearly every day. In a house that has no air conditioning (yes, you read that right) we quickly found that the ceiling fan was definitely a necessity. It cooled the main living areas down rather quickly and we were quick to flip it on during some rather stuffy early evenings. The verdict: it had to stay. 

As much as I wanted to come in here and buy new everything, when it comes to buying the finishing touches – light fixtures, rugs, window treatments – we’ve allowed ourselves to live in our house as-is (despite how ugly or outdated) before making any of these strictly-for-aesthetic purchases just to see how we use the space and how it functions for us. Hello howdy-doody roman shade in the kitchen or the ugly vertical blinds in the dining area. #baneofmyexistence.

Had we not allowed our house this little trial run, we would’ve swapped out the ceiling fan for a hip new chandelier (because hello! #ihateceilingfans) and come summer we would’ve been dripping in sweat and cursing the day we took the fan down.

I did a little digging on Pinterest for some ceiling fan inspo – it’s always my go-to source whenever I’m stumped (or indifferent) about a design decision – and ended up pinning these images below:


After my binge-sesh on Pinterest, I quickly realized that not only are there SO MANY ceiling fan options out there (why?) but your fan needs to be properly sized to your room for optimal efficiency. I found this guide about how to properly size your ceiling fan to be super helpful.

Armed with my Pinterest inspiration and now fully educated on ceiling fan sizing, the search was #onlikedonkeykong. Determining my new-found ‘ceiling fan esthetic’ (thank you Pinterest) and what size fan the room required for optimal efficiency (thanks to this guide), I was able to narrow down the field of possibilities quite a bit.

Here was the criteria I was working with:
  •          A fan that leaned a bit modern
  •         No boob lights / 4 cluster lights – single light kits only!
  •         3 or 4 blades
  •        Little to no down-rod (even though I love the look of a suspended fan, our ceiling height can’t       accommodate)

After an exhaustive search – both in store and online – we finally chose a winner and I placed the order today! I never thought I’d say this, but I’m ‘jumping up and down’ level excited about it and I cannot wait for it to arrive! #ohhappymail day it will be!

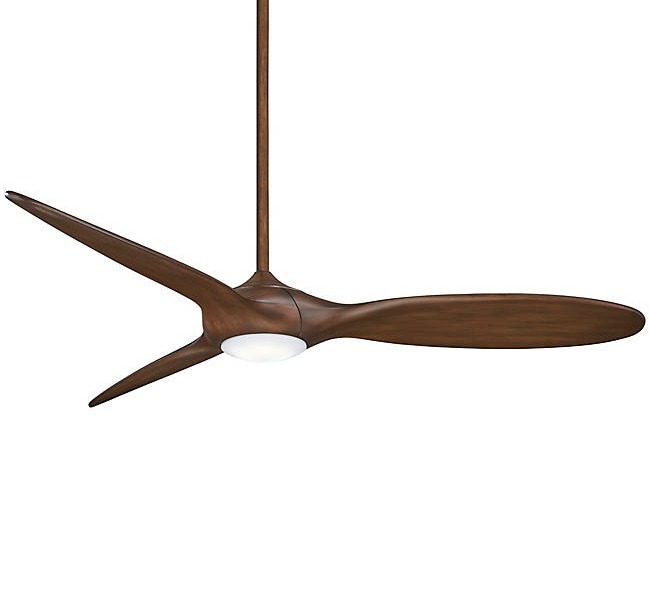
While I’m eagerly waiting for my fan to arrive there are no after photos to share just yet. But in the meantime, enjoy this round-up of the perfect modern fans for $500 or less…because someone of them are just too good not to share – and I did way too much online shopping for it to go to waste!
From one ceiling fan hater to another – enjoy!

With Light Kit:


Without Light Kit:


Have you ditched the hater train and joined the fan wagon? Because you totally should. Fans have come such a long way aesthetically and these ain’t yo Mama’s fan! #wordtoyourmother


Psst – my fan is lurking amongst the picks somewhere. Can you guess which one we chose?

Thursday, December 3, 2015

The Entryway Re-do

The entryway in our apartment can hardly be called an entryway. It’s a 4’x3’ pint-sized speck of space that really has been useless…until now! Despite its small footprint, the functionality of this space really needed to pack a punch. An entryway in a home is probably one of the hardest working spaces a home can have. It’s the first space we encounter when we walk through the door and the place we unload our junk – think hats, jackets, bags, keys – just to name a few.

The problem with our entryway or lack thereof, is the tight spacing. The swing path of the front door is essentially all we have to work with. That’s it folks. We tried a few different options (as seen below) and even mocked some up in the past but none ever seemed to fit the bill when it came to functionality.


This shelf situation lasted the longest but probably only out of laziness or from being stumped as to how to solve the problem. Then one day I was just so fed up with it and took everything off the wall. As with most projects – starting with a blank slate is really the first step. It pushes the reset button on the space and allows my brain to reset too in terms of design. Without the distraction of “stuff” I hate staring back at me, I can start brainstorming on a solution that I’ll love in the end.

I patched all the holes and gave the wall a fresh coat of paint. Then I made a list of the issues.

Clutter was the #1 issue and biggest driving force behind the entryway re-do.  What I learned from the last time around that I tackled this space is that we’re not a family that can handle “open shelving”. Some are, some aren’t. We are definitely in the AREN’T category. Unless I constantly policed or tidied up the shelf, it was a constant catch all for “stuff”…receipts, business cards, candy and/or candy wrappers, change, pens, pencils…etc. It was a nightmare.

The 2nd biggest issue was ease of convenience. Over time I’ve found that unless it’s easy, kids and ahem…grown men, won’t use it. It was amazing to me how many times I found jackets strewn all over the house – on the couch, backs of chairs, on the floor (!!!!), when our coat closet was literally an arm’s reach away! Apparently small kids and grown men have trouble opening doors and reaching for a hanger to hang up their coats.

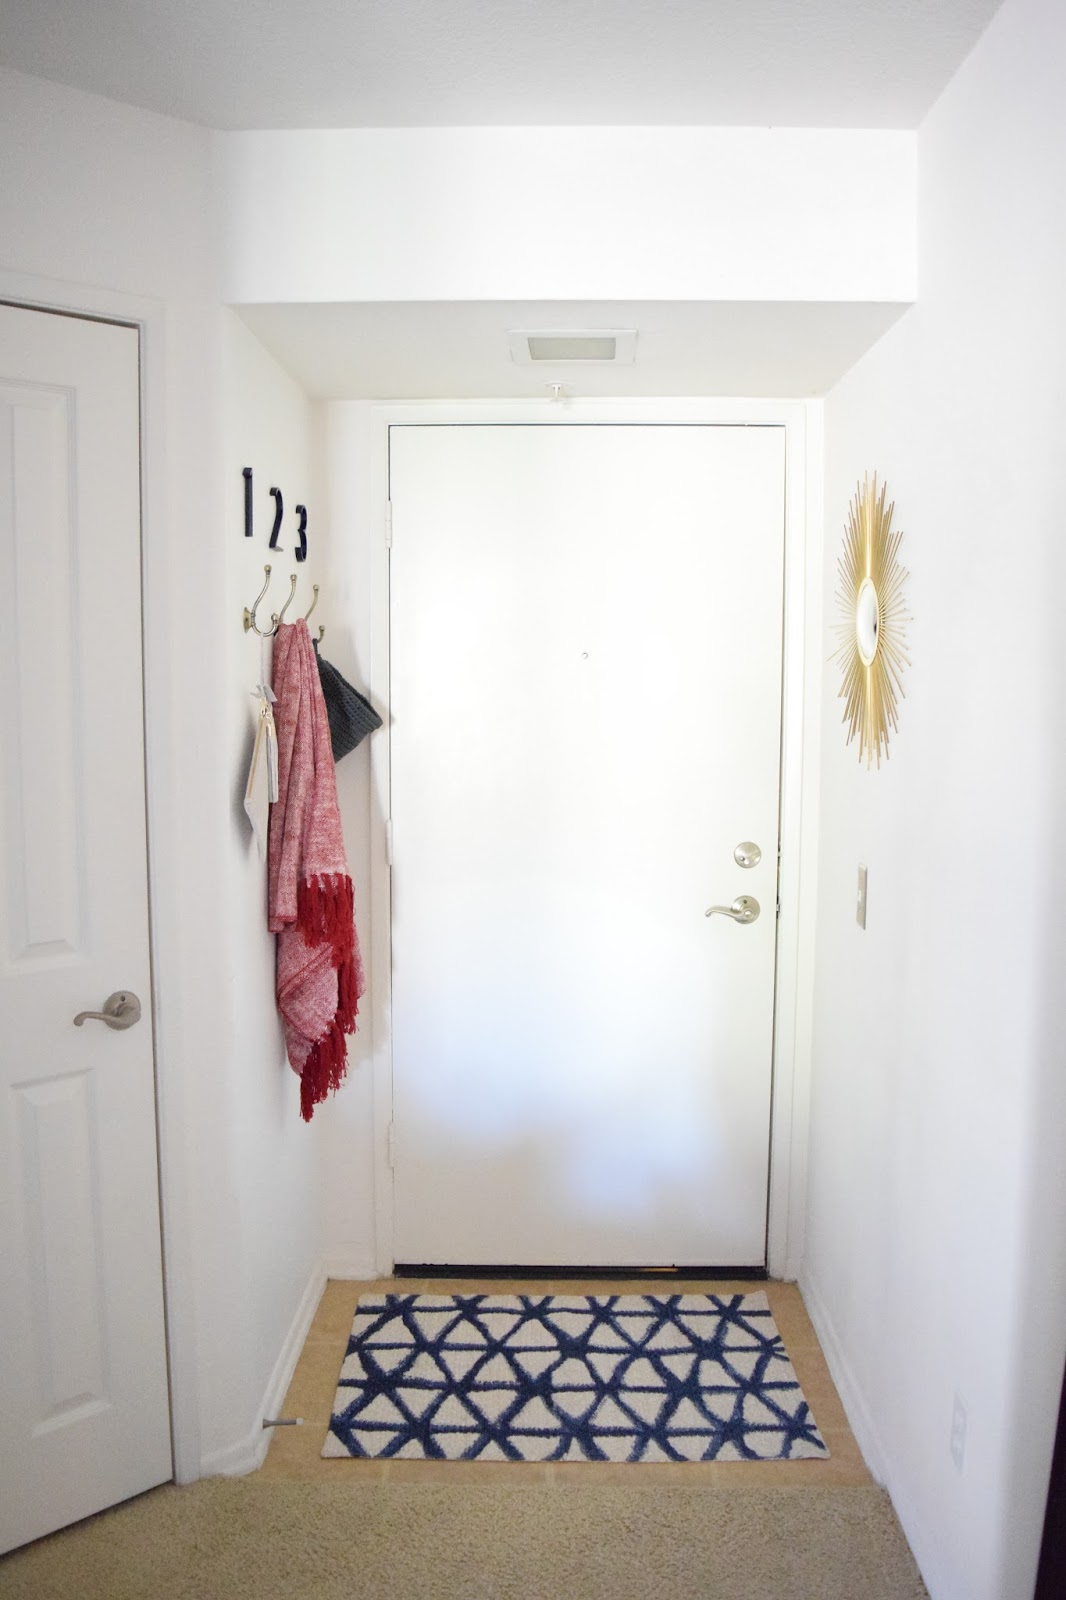
With all my issues written down, I set about to solve them once and for all and give our tiny entryway a whole lot of functionality too. What I ended up with is hooks and baskets. No more open shelves! I determined that clutter will always be but I can handle the clutter so long as I don’t have to see it J. Below is the end result – ain't she pretty?


I installed a set of 3 hooks that people of all ages can use with ease – no more hassling with hanging our coats in the coat closet. For whatever reason, hooks are so much easier for kids and even grown men to use. The thought! We still keep additional coats in the nearby closet but for the ones we use more often, these hooks have been a saving grace. They’ll come in handy too for guests who need a quick and easy spot to store their coats while they’re visiting without having to ask where to put it. Using the hooks in our entryway have worked so well that I’m thinking of using them in the bathrooms too instead of towel bars – another things certain people in our household have trouble using!


To tackle all the other clutter that seems to accumulate at the front door, I hung up a woven basket that I picked up from the bath section at Ikea to corral wallets, receipts, cards, loose change – all of the above! As I said before…as long as I don’t see it, I can deal with it. The basket conceals the mess and is big enough to hold every day essentials like wallets and keys. I still keep my keys inside our coat closet with my purse, but for my guy who likes to empty his pockets at the door, this has been a perfect solution for him. When it starts getting out of hand, I can easily sort through the contents and purge what isn’t needed. What was once a daily battle is now something that only needs to be managed once a week. A win-win.


Once the issues had been addressed, it was time to add in some personality! My favorite part of any project. I added a couple of address numbers above the hooks because they were right next to the hook section at Lowes and I liked how modern and sleek they looked next to the almost aged look of the hooks. I painted the numbers a deep navy blue which ties in the brand new Target rug I found at Goodwill (score!). Goodwill is like Target’s clearance center in case you haven’t been lately.


The sunburst mirror added to the opposite wall lets us ladies (or guys too) do a last minute quick look when we’re headed out the door and it’s gold color coordinates with the aged hooks on the opposite wall.


Here's a look at the new entry in relation to the coat closet that I organized almost a year ago. The systems I installed nearly a year ago are still working well for our family so now with the functionality of both these spaces give us no room to make excuses!


Making these small changes has really added so much value to this tiny space and allowed it to really work for our family. Living in such tight quarters makes every bit of real estate so valuable and when it can function the way our entryway functions now it makes the time and money spent very well worth it.

Thursday, November 12, 2015

Fall for $20


Although the calendar indicates that Fall is officially here and underway, Southern California hasn't gotten the memo. It's still hot around these parts (we're flirting with the 80's) but temps have been dropping and I hope they continue to do so. There's no time of year I love more than Fall.
 
I usually break out the Fall / Halloween décor by late September / early October to really get into the spirit of things that this time of year brings but with everything we've been through over the last few months, I just haven't gotten around to it.
 
With Halloween almost here and Thanksgiving just around the corner, I wanted a quick and simple project that would sprinkle our home with those warm and cozy fall feelings without having to drag our décor bins from the depths of the black hole garage.
 
Buffalo check is all the rage right now and what perfect timing because this bold take on a classic plaid print is so fitting for the season. Ive been oogling over these gorgeous pillows but when I spotted a similar fabric at Ikea for a fraction of the cost, I picked up a yard on a whim and decided to make my own low-budget version.
 

If I've said it once, I'll say it again - pillows are the easiest way to change up the look and feel of a room in an instant without much of an investment. So with my Ikea fabric, I made two pillow covers in about 30 minutes start to finish all in an effort of infusing a little fall coziness into our main living space.
 
I've done my fair share of sewing but usually just ask my super-sewer Mom to make my pillow covers for me instead of bothering to do it myself. But these ones? They're all me! Even someone with the most basic of sewing skills could whip these up, no problem!
 
With a little direction from my Mom, I made two super simple envelope style pillow covers out of 1 yard of fabric. The Internet (and Pinterest) is flooded with tutorials for this type of DIY so I won't bore you with another - just click here and use any one of these tutorials to make your own.
 
But how about a few helpful hints before you dive right in?
 
#1 - Always remember to make your cover smaller than your pillow insert. This may seem illogical but it's the most important thing I've learned and the key to getting the fullest pillows! A general rule of thumb is to make your cover 2" smaller than your pillow insert. For example: if your inserts measure 20" x 20", you'll want to make your pillow cover a finished size of 18" x 18". Be sure to account for your seams when cutting your fabric!
 
#2 - Reinforce the seams where the two back flaps of your cover overlap. When you're stuff your cover with the insert, that area will have the most stress put on it from all the pushing, pulling, and re-arranging your insert. Having a reinforced seam will make sure that your cover doesn't literally rip at the seams.
 
With those tips in mind, after my covers were sewn, I gave them a quick press with the iron just to iron out any wrinkles and to press the seams. But I didn't stop there. I decided to add a few yarn pom-poms to each corner of the pillow because nothing says fall like a good plaid and some cozy textures!
 
To make the over sized pom-poms you'll need:
  1. Yarn
  2. Scissors
  3. Steel yarn needle
I started by wrapping the yarn around 4 of my outstretched fingers like so:
 
I wrapped the yarn loosely around my fingers approximately 70 times until my bundle was pretty thick. The same technique can be used around less fingers or wrapped around fewer times to achieve a smaller pom-pom too.
 
There are several tools out there that you can buy to assist you in making pom-poms but I didn't have any of them so I improvised and used my fingers instead which seemed to work out just fine.
 
Once I wrapped the yarn around a sufficient amount of times, I carefully slid the bundle off my fingers and laid it in the center of a 12" piece of yarn that I had previously cut.
 
With the single piece of yarn, I tied a knot in the middle of my bundle and then flipped it over and tied a second knot.
 
With the tied bundle, I slid my scissors through the loops on either end and cut - careful not to cut the center tie.
 
After cutting all the loops on either end you can choose to trim your pom-pom for a more uniform look or leave it as is.
 
Once I had all my pom-poms made, I used a steel yarn needle threaded with a length of yarn and sewed each pom-pom to the corner of my covers. Easy-peasy!
 
Ready to see the final result?


How cozy are these pillows? And what a big difference they make! Not too shabby for $20, right?!


Gimme all the heart eye emojis...I think I'm in love! Are you too? Please tell me you agree!
 

Tuesday, June 16, 2015

15 Minute Fix - Bar Tray


Hi friends!!

I'm back from our Hawaiian vacation, very well rested, and cant wait to share all the fun we had basking in the sun! With all unpacking and laundry that needs to be done I thought the best first project back post vacation would be another project in my 15 Minute Fix series where I tackle a project or something on my to-do / want-to-do list in 15 minutes or less because sometimes all we have time for are quick little projects, am I right?
 
This project is all about reinventing an ordinary, every day item. My favorite kind of DIY! I spotted this pink mirror at the thrift store and although I didn't need a new mirror, the mirror was inset in a deep frame and I thought it'd make the perfect tray. Just so happened that I needed a tray because one can never have too many trays!


To change my thrift store find from a mirror to a tray, I started by taping off the mirror with some computer paper and painters tape and then sprayed the entire frame white.

 
 After the frame was painted, I removed the hanging hardware from the back of the frame. Once the hardware was removed, I covered the bottom of the tray with craft foam sheets that I found at Michael's. To adhere the foam to the back of the mirror, I used spray glue and let it cure for a full day.
 
To add some interest to the mirror turned tray so that it wasn't just a boring white tray, I attached these brass corner brackets on each corner.

 
 Once completed, I loaded up my new mirrored tray with all our bar essentials. The mirrored tray is reflective and looks great with all our decanters we've collected. Since the tray is mainly stationary and really just meant to define a space atop our buffet and to corral all our bar necessities, I never have to/need to move it while all loaded up. I don't suggest transporting the tray fully loaded as the mirror may crack under the weight of the items.


How's that for a quick 15 minute project? This project was so, so easy and the perfect post vacation project while I'm knee deep in laundry and vacationing from my vacation!


Wednesday, May 27, 2015

Outdoor Entertaining Essentials


Hey all! So much going on in my neck of the woods but just wanted to let you all know that for the moment the patio reveal is on hold. Its nearly done but I decided to add some last minute projects to really turn the space into something I really love and am proud of. Although I've only been blogging and sharing my world with you for a short time, I really only want to post and share projects that I love and am proud of. Otherwise I don't feel that this blog would be genuine or true to who I am. As of right now...I'm just not there with the patio...I've sorta hit a brick wall with the patio and need to take a step back and re-evaluate what I envisioned for the space originally. But I will finish it soon and when that day comes, you'll be the first to see! Deal?
 
If I could ever finish the patio I might be able to enjoy some of the items I'm featuring on the blog today because we're talking all things outdoor dining and entertaining. Summer is almost here! I keep saying "almost" because California has been experiencing an unseasonably gloomy May so as soon as California can make up its mind and temperatures start rising, I'm sure we'll be dining alfresco in no time! And good thing because...there's just so much good stuff out there folks! The outdoors have never looked so good.
 
Speaking of good totally amazing...have you seen this patio refresh? I'm still picking my jaw up off the floor. It was gorgeous before...and now?! This is what patio dreams are made of people!
 
Today I'm rounding up a whole slew of items perfectly designed for outdoor dining and entertaining. Maybe some of you (with finished patios and backyards) can find some use or inspiration from the items featured below. The stores are just killing it these days with so much awesome outdoor décor!
Outdoor Entertaining Essentials
 
 
Well? What do you think? Are you ready to invite friends and family over for a big ole BBQ? Some margaritas maybe? I know I am! Now...if only I can figure out the patio situation...hmmm!

Friday, May 15, 2015

Aloha!

In a little over 3 weeks, I'll be 30k feet in the sky and on my way to Hawaii. Aloooo-ha! I cannot wait! The sand and sun will sure beat this weird rainy weather we've been experiencing the last few days. Rain in California? Is there even such a thing?!
 
This time around we chose to rent a house vs. staying in a hotel and from what I can gather from all the reviews and recommendations from friends and family...it's absolutely the way to go. The pictures online of the house are stunning. It's a waterfront property and exactly what tropical dreams are made of. If you follow me on Instagram (you totally should) I'm sure I'll be sharing plenty of beautiful sites and scenery along the way, so don't miss out!
 
Because I have Hawaii on the brain, I've rounded up some items with a tropical flair and thought I might share my finds with you! Even if you can't go on a little tropical vacay, doesn't mean the tropics can't come to you!
Hawaiian Style 
 
I'm pretty sure there aren't any flamingos in Hawaii, but hey...I couldn't resist. Also...I'm dying to get my hands on those canisters. Who doesn't love pineapples or white ceramics?! Umm...no one! As for that pineapple bowl...I recently scored a similar one at a thrift store for a couple bucks, but this one is gorgeous. And that flatware. Don't get me started. Just make sure you leave enough for me to buy too!
 
We'll be vacationing in Oahu and while this will be our second time visiting this beautiful island, I'm always eager to find new places to explore, see, or things to do! That's where you come in. Suggestions are very much welcomed before I head on out! Any must-see, must-do, must-eat spots that you absolutely love? Help a girl out here, I'd love to hear!