Showing posts with label home décor. Show all posts

Monday, December 11, 2017

Reviewing Our Couch - 5 Years Later

By far the thing I get asked most about on social media or the blog is about our couch. Despite it being nearly 5 years old, it's still all anyone ever wants to know about. I thought it might be helpful to put a post together with all the couch info in one place for all those who are always asking. I think it's safe to say that we've fully vetted all the pros and cons over the last 5 years so I thought we'd pass the info along.

 
It took us quite a while to find the perfect couch - but not for lack of looking! My other half has a really hard time making any sort of large purchase without exhaustively seeing all the options two or three times! When we moved in together we were couch-less for nearly 3 months before he felt confident enough that we had seen everything there was to be seen and were making the right choice. By the end of it all I would've bought any couch just to stop the insanity.

We ended up purchasing our couch at a local store called the Design Center Furniture - a place we visited three times during our search. We chose a Robert Michael couch from the Rocky Mountain Collection and what we loved most about the couch was that it was completely customizable. The top 3 things on my couch wish list were: comfort, washable cushions, and a loose pillow back. Being able to customize our couch allowed us to tick all those boxes.
 
CUSTOMIZATION:
 
Our first apartment's living room was over 15 ft long so we ended up going with a 2 piece configuration - a 1 arm sofa and chaise - making for an 11 foot couch! I loved that we had the ability to choose any configuration that would suit our lifestyle and a length that was perfect for our space.
 
We were also able to choose the couch fabric and fabric for 4 coordinating pillows. For the most part we chose a great fabric...it's very forgiving and has worn extremely well and since baby girl has come along...it's taken quite a beating. But there is a downside! The fabric is ribbed and directional which means it doesn't really allow us to flip the cushions or pillow backs for optimal wear. Since the ribbing is directional and if flipped the direction of the ribbing gets a "ruffled" look...but that's due to our choice in fabric and not about the quality of the fabric.
 
COMFORT:
 
I want our home to be and look lived-in and cozy and I think the couch really helps us achieve that goal. I think what makes our couch so comfy are the down filled cushions and one I recommend!
 
Aside from aesthetics, the couch is the epitome of comfort. The standard high density foam cushions are wrapped in down which makes it extra squishy and soft. I can't remember if this was standard or an option we chose but we love it. The couch is very deep which is great for tall people (not us) and our older family members do sometimes have difficulty getting up (pregnant people too - ha) because you really just sink into it and it's pretty low to the ground.

Next time around, we'll definitely get a couch with legs so it's higher off the ground and easier to get up from. No biggie though.


WASHABLE:
 
What I wanted most in a couch was removeable cushion covers that can be removed and thrown in the washer for easy cleaning - and after a scare with that spray hair coloring (red!!!) - I've never been more grateful to be able to throw the covers in the wash. I typically wash the covers 2-3 times a year but I stress less about accidental spills on our couch knowing they're so easy to clean.
 
After a quick run through the wash and spin through the dryer they're fluffier, snugger, and the couch looks brand new all over again.
 
LOOSE BACK:
 
This was also high on my list of must-haves! Loose pillow back prevents that smushed look you sometimes get with cushions that are attached to the couch - or if you have an animal who loves perching atop the couch. The loose back cushions are basically just giant pillows that can be fluffed and made to look brand new again!
 
 
It does mean that they often get disheveled throughout our every day use but I mean...how cute is this? Makes for great fort building too!
 
 
So after an exhaustive 3 month couch hunt, I'm super happy with our couch and am extremely impressed with how it's held up the last 5 years we've owned it. We aren't currently in the market for a new couch but I am sorta itching for a new one.
 
Here's what we'd do and wouldn't do next time:

Again: purchase a couch with loose pillow back
Again: purchase a couch with removeable cushion covers for easy washing
Again: purchase a couch with down filled or down wrapped cushions
Not Again: purchase a couch with directional fabric
Not Again: purchase a couch so low to the ground
Not Again: spend 3 months looking :)

And if you need even more couch inspo - here are a few couches that I'm really loving and would snatch up in a heart beat!

 Six Penny - Neva Modular Sectional
 Interior Define - Caitlin Chaise Sectional


 Tell me! What are your couch must-haves and what is a normal life expectancy for a couch?


Friday, May 20, 2016

Combating Design Indecision

I kinda had a moment early on while S and I were discussing an expensive upgrade/repair we want need to make to the house. I was waffling back and forth, procrastinating like it’s my job, and just out right delayed calling for quotes/consultations as long as I possibly could. Picture me telling him that I’d call around for estimates tomorrow but “tomorrow” turned into next week and the “next week(s)” just kept on coming.

The problem? I didn’t know what I wanted. Therefore…I didn’t know what to ask for.
S is kinda the guy that would prefer an already “finished” house (one he doesn’t have to renovate, rip apart, just to put back together) – but he’s also smart enough to know that, for me (lover of all things interior and design), no house will ever be “finished”. Through this entire renovation journey, he is learning to love the process and realizing that no cookie cutter house could ever be as great as the one we’re creating with our own two hands. But he has moments where he gets stuck in that “what-did-we-get-ourselves-into?” and “I-can’t-see-the-light-at-the-end-of-the-tunnel” state of mind and just can’t grasp why I’m so frozen with indecision sometimes.

To him, a door is a door. Grey is grey. But no, my friends, it’s not. Po-tay-toe, po-tah-toe.
So when it came time to make this decision I was undecided about what it was I wanted vs what we could afford and I just couldn’t - as he put it - “hurry up and decide”. At first he didn’t understand and was annoyed but I was feeling pressured and rushed into making a huge (not to mention expensive) decision about OUR house that I just wasn’t ready to make. I hadn’t thought it out long enough, gathered enough inspiration, researched all the options, the best materials, contractors…and frankly, I just wasn’t well informed.

After explaining to him that even though my indecision was stalling our progress and as he put it, “annoying”, it was for good reason. I want the decisions I/we make (especially the really expensive ones) to be well thought out and purposeful. The last thing I want to do is pour money into a decision that we end up hating or regretting. For the very first time in our lives we have the opportunity to give these decisions the time and consideration they deserve because when you buy a house, there really isn’t (and shouldn’t be) any rush. We’re here for 30 years.
He finally gets it.

I’m enjoying the renovation process and this stage of life that we’re in right now. As a renter, I never had the freedom or 30 years laid out before us to take all the time we could ever possibly need to make the right choices for us, for this house. By far the best thing about buying this house is that I don’t feel rushed. And I’m sorta digging it.

But if you’re like me a need a little help from time to time to get over that hump, here’s 5 ways I combat design indecision:
Pinterest

It’s always the first stop when starting a new room but it also helps pull me out of that funk too. I log onto my Pinterest boards to re-confirm that “hey girl, you got this”! Pinterest is a great source for inspiration and does a heck of a job compiling all my likes into one place. It’s a great at-a-glance tool to see that I pin a lot of light/bright/all white spaces and orange/red food (haha) so if I’m designing a super moody room and suddenly feel like this “isn’t me” betcha Pinterest will agree.

This isn’t to say that you can’t/shouldn’t divert from your normal aesthetic but Pinterest can also help you hone in on your evolving style too. It’s a great tool to really narrow down what you like but more importantly, what you don’t. I turn to Pinterest a lot when I’ve hit a wall and need another jolt of inspiration to push me over that hump.

Build a Board

I’ve mentioned this a few times before but after browsing Pinterest, putting together a design board is usually my next step. I’ll virtually build my room right there on the page and swap items in and out all day long. This can be very time consuming, sometimes taking me hours/days to get it to a good jumping off point. But the great thing is that it can be tweaked along the way and all my rooms usually end up with 3 or more versions of its original design after all is said and done.

Putting together a design board is a great visual road map that can be used to trigger product purchases for the room or what needs to be DIYed / hired out in order to complete your vision. Nothing is off limits here either. If in my searches I find an out-of-budget item that I just have to have, I’ll still throw it into the design and either a) find a more budget friendly look-alike option, b) scale back other aspects to afford that item, or c) save up until I can purchase my dream piece.
Sky is the limit here and when you’re paralyzed with making those design decisions, nothing’s worse than being strapped down with limitations.
When in doubt, try it out!


We’ve all been there.

You go to Target for deodorant and leave with one of everything. We take a detour down the home décor aisles, get distracted by the “pretty” things, and suddenly what started out as a $5 shopping trip turns into a $500 one. Target décor is on point these days and it’s OK to drink that Nate Berkus/Threshold kool-aide. I ain’t mad-at-cha girl!
This is by far one of the best ways to help me combat design indecision. I call it auditioning. While searching for a particular item I’ll bring home two, three, or even four options (because they’re just that good!) and audition them at home in their would-be-space. As a visual person, this helps me immensely! So go for it. Fill your cart up with 97 pillow options and then try them out at home. See what works and what doesn’t – what you like or don’t like. Your husband/wife might think you’re nuts but that’s what a 30 day return policy is for.  
It’s OK to change your mind

Even after I’ve done all the pre-planning and auditioning sometimes things still don’t work out and it throws me for a loop. Instead of getting stuck, I give myself permission to change my mind, course correct along the way, and you should too. Just because you put it in the basket and brought it home, doesn’t mean you’re committed to it forever. If you hate it, get rid of it. Most things aren’t that important to keep around for the sake of keeping around. You’ll love your space a whole lot more if you allow yourself a few do-overs along the way.
Spaces rarely come together over night and instead, the best spaces evolve over time. Don’t feel pressured to get it right the first time because for me, half the fun is trying.

Wait it out

Rome wasn't built in a day and neither was your house. There have been many rooms I started and then abruptly stopped because I just "wasn't feeling it" or didn't like the direction it was going. In fact, half my apartment sat semi-finished for most of the time we lived there and I'm prepared so sit on these rooms in our new house if I need to. That's life.

There's no reason to force your design choices or to make rash decisions. Some of the most well styled and put together rooms happened over time...not overnight. If you've hit a brick wall and don't know what to do, buy, DIY next...wait it out. Turn your attention to another room, space, project and inspiration will come soon enough and you'll have a clear enough vision to pick back up where you left off.

............................................................................................................................................................
And that's it, blog friends! Sorry for such a wordy post this Friday but we've all been there before and sometimes we just need a little help to get over the fear and design indecision. Anyone out there been here before? What did you do to jump start that creativity and get the ball rolling again? Do tell...

Tuesday, May 3, 2016

I'm a Fan!

With our house still in disarray (read: we’re a blow-up mattress away from glorified camping) and while we’re stuck in this waiting phase of the renovation – we’re turning our attention to what can get accomplished during the downtime. So while all the chaos happens below our feet, things are looking up! 

Today we’re talking ceiling fans!

One of the more offensive fixtures in our home was this ugly and outdated ceiling fan:


Not to mention yellowed and discolored...


Sure, it was operational but it definitely wasn’t our aesthetic and during our initial walk-through of the house, it was at the very top of the list of things that had to go because…well…I hate ceiling fans. #truthbetold

But! In the 2 months that we’ve lived here, we’ve used it nearly every day. In a house that has no air conditioning (yes, you read that right) we quickly found that the ceiling fan was definitely a necessity. It cooled the main living areas down rather quickly and we were quick to flip it on during some rather stuffy early evenings. The verdict: it had to stay. 

As much as I wanted to come in here and buy new everything, when it comes to buying the finishing touches – light fixtures, rugs, window treatments – we’ve allowed ourselves to live in our house as-is (despite how ugly or outdated) before making any of these strictly-for-aesthetic purchases just to see how we use the space and how it functions for us. Hello howdy-doody roman shade in the kitchen or the ugly vertical blinds in the dining area. #baneofmyexistence.

Had we not allowed our house this little trial run, we would’ve swapped out the ceiling fan for a hip new chandelier (because hello! #ihateceilingfans) and come summer we would’ve been dripping in sweat and cursing the day we took the fan down.

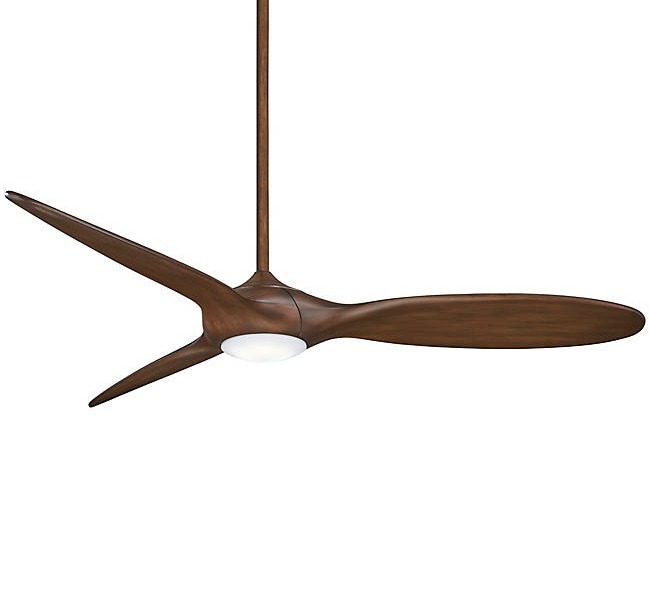
I did a little digging on Pinterest for some ceiling fan inspo – it’s always my go-to source whenever I’m stumped (or indifferent) about a design decision – and ended up pinning these images below:


After my binge-sesh on Pinterest, I quickly realized that not only are there SO MANY ceiling fan options out there (why?) but your fan needs to be properly sized to your room for optimal efficiency. I found this guide about how to properly size your ceiling fan to be super helpful.

Armed with my Pinterest inspiration and now fully educated on ceiling fan sizing, the search was #onlikedonkeykong. Determining my new-found ‘ceiling fan esthetic’ (thank you Pinterest) and what size fan the room required for optimal efficiency (thanks to this guide), I was able to narrow down the field of possibilities quite a bit.

Here was the criteria I was working with:
  •          A fan that leaned a bit modern
  •         No boob lights / 4 cluster lights – single light kits only!
  •         3 or 4 blades
  •        Little to no down-rod (even though I love the look of a suspended fan, our ceiling height can’t       accommodate)

After an exhaustive search – both in store and online – we finally chose a winner and I placed the order today! I never thought I’d say this, but I’m ‘jumping up and down’ level excited about it and I cannot wait for it to arrive! #ohhappymail day it will be!

While I’m eagerly waiting for my fan to arrive there are no after photos to share just yet. But in the meantime, enjoy this round-up of the perfect modern fans for $500 or less…because someone of them are just too good not to share – and I did way too much online shopping for it to go to waste!
From one ceiling fan hater to another – enjoy!

With Light Kit:


Without Light Kit:


Have you ditched the hater train and joined the fan wagon? Because you totally should. Fans have come such a long way aesthetically and these ain’t yo Mama’s fan! #wordtoyourmother


Psst – my fan is lurking amongst the picks somewhere. Can you guess which one we chose?

Thursday, November 5, 2015

Plant Pots and Paint Pens

Say that 10x fast!

As I mentioned at the end of this post, I’m slowly trying to ease my way back into the blog and chip away at all those projects we put on the back burner for a bit. While we’re still knee deep in the raw every day emotions of this new life we’re adjusting to, staying busy helps.

Outside of this blog I work a regular ol’ 9-5 except instead of 5 – 8 hour days, I work 4 – 10 hour days with every Monday off. Having Mondays off is great! While everyone else in the world is at work, I’m able to accomplish a whole lot of blog related stuff and tackle a few projects around the house unless I turn on the TV and get sucked into a Gilmore Girls marathon – then all productivity goes out the window. Over the last few months, that sorta became the norm as I wasn’t very mobile towards the end but I’m slowly redirecting my focus and I have to say that it feels good.

This last Monday was a very productive one after many, many unproductive ones. I worked on and/or completed 5 new projects – all of which I’ll be sharing here sooner or later. High fives for me!

This first one is more so a facelift than it is a project and takes zero skills whatsoever. One of the things I love most about decorating is incorporating live plants into every room. I think plants just brighten up the space and when you add any sort of natural element it just brings the room to life. Unfortunately for me, I totally suck at keeping anything alive. That’s why I always tend to gravitate towards low maintenance plants – usually of the succulent variety. But even I’ve managed to kill quite a few of those too. Most recently I killed a snake plant…or most of it…which is considered to be virtually indestructible. #GOme. I think I have a chronic case of over-watering but I’m working on it.

I woke up one morning to find that 95% of my snake plant was water logged and the stalks were falling over, so after feeling like such a failure, I removed the dying stalks and was left with a whopping 3 stalks. Sure made for a wimpy plant. So while I’m trying to bring it back to life, I went to Home Depot and brought home my next victim and plopped it in the pot that the previous one vacated.

Except the pot totally sucks. Just like my plant caring abilities. It was just a plain white ceramic pot I picked up from Ikea and thought that maybe…just maybe…if I jazzed up the pot a bit the plant would last longer. #Ainthappening. But I went ahead and did it anyways because that’s how my crazy mind works. I could use all the help I can get.


The ceramic pot already had some raised detailing so I just took a paint pen and enhanced the details. Looks like a totally different pot – and much more expensive too might I add! Don’t you agree?


Here's a side by side:


And the best part? You don’t have to have these pots with raised details from Ikea to achieve the same look. Any plain ceramic, or terra cotta pot too for that matter, can be transformed with a paint pen and free-handing a super simple pattern…think dots, crosshatch, grids – the options are endless!

So what do you say? Think this super cute pot will help keep my plant alive? Probably not but #Onecanhope.

Thursday, June 18, 2015

Living Room Cha-cha-changes

I've been making a few changes to our main living space and am dropping in today to share the first of many minor tweaks that have been happening over the last few weeks.
 
I've been eager to infuse a little more color into our normally neutral living room for quite some time and one of the easiest and most cost effective ways to do that is through pillows. It's so easy and convenient to change out your pillows throughout the season or hey...just because! I'm a known hoarder of pillows and can always be found perusing the pillow aisles at any home décor store. One of the greatest things about having a mainly neutral base is that it makes adding color on a whim, so easy!
 
 
I picked these vibrant blue floral motif pillows up at HomeGoods and I think they're the perfect counterpart to the darker navy curtains while boldly standing out against the neutral backdrop of the couch.
 
 
I'm loving these new pillows so much and think they bring in the perfect amount of color for summer.
 
 
What do you think? Do you love HomeGoods as much as this girl does? Have you ever switched out your pillows for an instant change or for a quick living room face lift? How are you infusing color into your home this Summer?
 
Be sure to check back soon for the other living room changes we've made over the last few weeks! I'm so excited for you all to see!
 

Tuesday, June 16, 2015

15 Minute Fix - Bar Tray


Hi friends!!

I'm back from our Hawaiian vacation, very well rested, and cant wait to share all the fun we had basking in the sun! With all unpacking and laundry that needs to be done I thought the best first project back post vacation would be another project in my 15 Minute Fix series where I tackle a project or something on my to-do / want-to-do list in 15 minutes or less because sometimes all we have time for are quick little projects, am I right?
 
This project is all about reinventing an ordinary, every day item. My favorite kind of DIY! I spotted this pink mirror at the thrift store and although I didn't need a new mirror, the mirror was inset in a deep frame and I thought it'd make the perfect tray. Just so happened that I needed a tray because one can never have too many trays!


To change my thrift store find from a mirror to a tray, I started by taping off the mirror with some computer paper and painters tape and then sprayed the entire frame white.

 
 After the frame was painted, I removed the hanging hardware from the back of the frame. Once the hardware was removed, I covered the bottom of the tray with craft foam sheets that I found at Michael's. To adhere the foam to the back of the mirror, I used spray glue and let it cure for a full day.
 
To add some interest to the mirror turned tray so that it wasn't just a boring white tray, I attached these brass corner brackets on each corner.

 
 Once completed, I loaded up my new mirrored tray with all our bar essentials. The mirrored tray is reflective and looks great with all our decanters we've collected. Since the tray is mainly stationary and really just meant to define a space atop our buffet and to corral all our bar necessities, I never have to/need to move it while all loaded up. I don't suggest transporting the tray fully loaded as the mirror may crack under the weight of the items.


How's that for a quick 15 minute project? This project was so, so easy and the perfect post vacation project while I'm knee deep in laundry and vacationing from my vacation!


Wednesday, May 27, 2015

Outdoor Entertaining Essentials


Hey all! So much going on in my neck of the woods but just wanted to let you all know that for the moment the patio reveal is on hold. Its nearly done but I decided to add some last minute projects to really turn the space into something I really love and am proud of. Although I've only been blogging and sharing my world with you for a short time, I really only want to post and share projects that I love and am proud of. Otherwise I don't feel that this blog would be genuine or true to who I am. As of right now...I'm just not there with the patio...I've sorta hit a brick wall with the patio and need to take a step back and re-evaluate what I envisioned for the space originally. But I will finish it soon and when that day comes, you'll be the first to see! Deal?
 
If I could ever finish the patio I might be able to enjoy some of the items I'm featuring on the blog today because we're talking all things outdoor dining and entertaining. Summer is almost here! I keep saying "almost" because California has been experiencing an unseasonably gloomy May so as soon as California can make up its mind and temperatures start rising, I'm sure we'll be dining alfresco in no time! And good thing because...there's just so much good stuff out there folks! The outdoors have never looked so good.
 
Speaking of good totally amazing...have you seen this patio refresh? I'm still picking my jaw up off the floor. It was gorgeous before...and now?! This is what patio dreams are made of people!
 
Today I'm rounding up a whole slew of items perfectly designed for outdoor dining and entertaining. Maybe some of you (with finished patios and backyards) can find some use or inspiration from the items featured below. The stores are just killing it these days with so much awesome outdoor décor!
Outdoor Entertaining Essentials
 
 
Well? What do you think? Are you ready to invite friends and family over for a big ole BBQ? Some margaritas maybe? I know I am! Now...if only I can figure out the patio situation...hmmm!

Thursday, May 7, 2015

15 Minute Fix: Updating Dollar Store Vases

Hey there! Sorry for the brief hiatus...it's been a busy, but productive, few weeks (ahem...patio! I'm talking to you!). The patio makeover has literally eaten me alive but I'm rounding the home stretch and can finally see the light at the end of the tunnel so for now I don't have any other patio updates except to say that the chairs arrived and they're all kinds of tooshy heaven, but I wanted to pop in and share a quick little project I checked off my to-do/want-to-do list recently.
 
With summer knocking on our door, or at least here in CA it is, I'm loving the longer daylight hours and what that means for the blog and the endless amounts of projects I have going at any given time. The extended daylight hours sure make it easier to work on projects and photograph them after a long 10 hour day at the office but even with the added convenience that Daylight Savings brings, sometimes all I really have time for after work, traffic, dinner, clean-up, and all that jazz is a quick 10-15 minute project. Anyone else feel the same? And heck...let's be honest...sometimes I have no desire to do any of the aforementioned tasks and instead just plop myself down on the couch and watch HGTV on repeat. Feel me now?!
 
If you're anything like me, your brain never shuts off and there's always a to-do list a mile long. When I sat down to actually write out what I wanted/needed to accomplish, I realized that a lot of these items were quick, easy, and something I could easily get done in 10-15 minutes...if only I actually set aside those minutes to actually do them. What a concept! Sometimes something as easy as putting pen to paper puts things into perspective and makes all those to-dos a whole lot more manageable.
 
So because I thought many of you might be in the same boat as I, I thought I'd start a new series of sorts with quick 10-15 minute projects straight off my own to-do/want-to-do list that even you might find useful when time is limited.
 
Please don't judge me on my to-do list prioritization because as you'll see when you come back for the next post in this series, I chose to paint dollar store vases first before I tackled the disaster that is my purse because obviously gold vases are way more important than organized purses. Moving on...
 
Over the years I've managed to accumulate close to 50 (#youthinkimkidding) dollar store vases. How? I have no idea, but yeah...it happened. If you need a few vases, holla at your girl! They're the perfect vessel for so many things around the house and because I have so many, I thought I'd have some fun with a few.
 
All I did was tape off a portion of the vase using some blue painters tape. You can get all kinds of crazy or creative with your pattern, just mask off the area that you don't want painted and leave the area you do want painted exposed. For my vases I just taped off an asymmetric line. Sorry, no pics of this! Then just spray the vase whatever color you fancy. I chose gold...because well...duh...I'm obsessed with gold.
 
Once the paint is dry, remove the tape and ta-da! Dollar store vases look like they cost $1.50 now!
 
 
This is literally the easiest project on the face of the planet. I didn't re-invent the wheel, this project isn't going to break the Internet, and you've probably seen it done a thousand times a thousand times better, but it's been on my want-to-do list for-ev-errrr and now...it's not.
 
 
That's all for today - just a quick little 15 minute project for ya! Enjoy my friends! And be sure to check back soon for the next installment of 15 Minute Fix...or if you're lucky, you'll get a patio reveal soon!


Thursday, April 16, 2015

Our $50 Bathroom Refresh

When we were apartment searching almost 2 years ago, I swear we looked at nearly every apartment in the area that fit out price range. After what felt like weeks and months of endless searching we finally settled on the apartment that we currently call our home sweet temporary home. Emphasis on temporary. When we toured the model floor plan of what would soon be our floor plan of choice, what I remember seeing ended up being very different than what we moved into. We toured a spacious, light, bright, and beautifully staged apartment model that hit most of the items on our checklist. It made choosing this complex and floor plan and easy decision after such a hard search.

The 2 things I remember most about that tour was all the beautiful natural light and the large master bathroom with dual sinks. The master bathroom was bigger than any we had seen...it was a long room with high ceilings and no doorways - think open concept. It was spacious and equipped with dual sinks - perfect for the 2 of us who would be utilizing this space at the same time every morning. Sadly though, what we moved into was quite the opposite. Our apartment windows are literally facing the exact opposite direction as those in the model apartment, making all that beautiful natural light that I remembered nearly non-existent. And the master bathroom? Bad. Real bad. Nowhere near the example of the model apartment. The trickery!

I remember moving in and grabbing a box to deposit in the master bathroom and stopping dead in my tracks. I swear we were given the wrong apartment. Our master bathroom is literally half in length of the model we had seen. A doorway separates the carpeted (gag) sink area from where the toilet and shower/tub are located and the door to the toilet/shower area opens inward and barely clears the toilet by about an inch...if that. The high ceilings are non-existent too. In fact, there's a huge bulkhead above our sink area making it feel cramped and dungeon-like...a far cry from the large master bathroom I was expecting to get. I almost cried. I was so confused that I called the leasing office and was informed that the model apartment we were shown had been retrofitted to be handicap accessible, thus meaning that all 1st floor, handicap accessible apartments had higher ceilings, wider doorways, or no doorways at all, making our 2nd floor apartment master bathroom layout entirely different, considerably smaller...and here's the kicker...being that we were on the 2nd floor, our ceilings, particularly in the bathrooms and hallways were indeed considerably lower that those of the apartments on the 1st and 3rd floors. Ugh.

Here's what I've been working with over the last year:
 
 
Not good, not bad. But knowing what I saw in the beginning, the bathroom situation could be way better. Especially if I lived on the 1st or 3rd floor. But I digress.

Unfortunately, being in a rental, there isn't anything you can do structurally. Recently, not having a place of our own that's ours has been weighing heavily on me. It's hard living in a space that isn't yours, your taste, your style, or one you can freely make changes to without the fear of paying for them later. But...this bathroom has bothered me so much over the last year, that I couldn't let that derail me. Even though I cant build the bathroom that dreams are made of, I have to make do with what we have. Just because I hate our current bathroom situation, doesn't mean I can't pretty it up to make it just a tad bit more bearable in the meantime.
 
I've been wanting to "decorate" this bathroom for some time as a way to make it a little easier to deal with its shortcomings. Over the weekend, I did just that. It only took a few hours (most of that time was dry time) and it only cost me about $50. That's about all the time and $$ this cruddy bathroom deserves anyways. #kidding #sorta
 
Without a whole lot of bathroom are that could be addressed, or much that I could actually change, I figured that zhusing up the boring apartment standard mirror would bring the most visual impact and give me the most bang for my buck. I thought about making a simple frame for the large mirror but decided to take it a step further and do something a bit different. I'd been on the hunt for some over sized frames to bring this vision to life but...I'm el-cheapo here, so it took forever to find a pair of frames that matched, were light weight, had visual interest, and didn't cost 8 million dollars. I know! A lot of must haves to contend with.
 
After several weeks of searching, and nearly scrapping this idea all together...I received this picture from my Mom:
 
 
She found these gaudy gold, plastic, oval mirrors at the Swap Meet for $15 a piece. Minus the mirror part, they were perfect for the bathroom project I had in mind! Aren't Moms the best? Yes...they totally are! Love, ya Mom! (We'll see if she really reads my blog after all - ha ha)
 
With mirrors in hand, I removed the paper backing, the mirrors, and painted the frames white. Don't forget to paint the underside of the frames too. The underside of the frame will reflect against the mirror if it's not painted too. Once dried, I used every renters best friend, 3M Command Strips for picture hanging. I positioned the strips all around the frame, and then attached each frame to the large bathroom mirror making sure each frame was centered over each sink. I didn't bother trying to measure exact placement, I just eyeballed it.
 
Ah, instant upgrade!


The only other items I added were 2 new clear glass soap dispensers ($12) and 2 new white hand towels ($8). We had everything else already. I decided to go with an all white color scheme because the space was so dark to begin with that it just really needed something to lighten it up and when I think of all white bathrooms, I think of spas and who doesn't love spas? Now walking into this dungeon every morning puts a little pep in my step.
 
 
The apothecary jars are dual purpose and I just love them. They house every day essentials like Q-Tips, cotton balls, an bath salts that just so happen to match the all white, spa-like feeling I was going for. They're pretty to look at and the clear glass doesn't obstruct or take away from the overall space. I love using pretty vessels to house ordinary items.


I brought in a little blue and white bud vase that I found at the thrift store a while ago and popped in some pink flowers for a punch of color. I've never had flowers in the bathroom before, but now...I'm a fan! It's impossible to be grumpy and crabby in the morning when flowers are around!


The last little detail of this bathroom refresh is this oval wooden tray. It was a last minute addition that didn't get photographed during my first round of shots but I found it in my stash and thought it was the perfect size to corral my bobby pins (in a cute dish of course) or small jewelry such as earrings or bracelets. The wood adds a much needed warmth and texture to the space and really rounds it off beautifully.


Not bad for $50, eh? A few thrifty finds and shopping your house can go a long way to amp up any space. Not being able to change much else, I think this is exactly what our bathroom needed. I'm now wondering why I didn't do something sooner in here and scheming up ideas for our much larger guest bathroom. Adding frames, whether they're over sized, chunky picture frames or from a mirror to a boring apartment standard mirror is an easy and temporary way to update your apartment rental bathroom without having to pay for the damage later! Using the 3M Command Strips makes it easy to remove with no evidence that it was ever there. Love those things! My only suggestion is to find a frame with a semi-flat back so that the Command Strips have a flat surface to adhere to. Also, use caution when removing the frames. Don't get all Hercules on them. Slow and steady wind the race.
 
Down the line, I may change out these oval frames for something more...dare I say...gender neutral? The filigree frames did go a bit girly-glam real fast and being that my boyfriend uses this bathroom too, I ought to find some chunky, over sized, rectangular frames that would put this bathroom back in the neutral zone. But...he's a trooper and gives me free reign, so until then, I'm hating on this bathroom a little less these days :)