Monday, July 10, 2017

DIY Cat Litter Cabinet

Aside from the new windows we installed late last year, another, more recent, addition we added to our sunroom is this cute little cabinet.


Before having the baby we attended an infant CPR and safety class where they encouraged all us soon-to-be-parents to baby proof the house before our little ones arrived. While we didn't go overboard and totally safeguard the house, we did take a few steps towards a safer home for little Emie girl. Along with adding outlet plugs, this little cabinet in the sunroom helped conceal one of the things I was most concerned about...our litter box!


We love our cat but we haven't ever loved his litter box - or the mess it makes and I always worried that one day in the not too distant future, I'd find our daughter using the cat litter as her own personal sand box. Now...not only is the cat litter out of reach of our almost-crawling-daughter but...I don't have to look at it either! #winwin

Inside we keep all our kitty essentials - food, along with a few rolls of plastic trash bags for poop scooping. A clear suction hook on the door works perfectly to hold the pooper scooper too! Everything thing we need fits right inside with room to spare.


DIYing our cat litter cabinet was super simple - just an extra large cat door - for our extra large cat - and this inexpensive Ikea cabinet - or any cabinet for that matter - is all you need!


We opted for this cabinet because it's dimensions worked perfectly for the small sliver of wall between the living room and the nursery but any cabinet big enough to house your litter box can work too!

Before putting the cabinet together, we cut out the hole for the cat door on one of the side panels using the template that was provided with the door using our Ryobi drill and jigsaw.


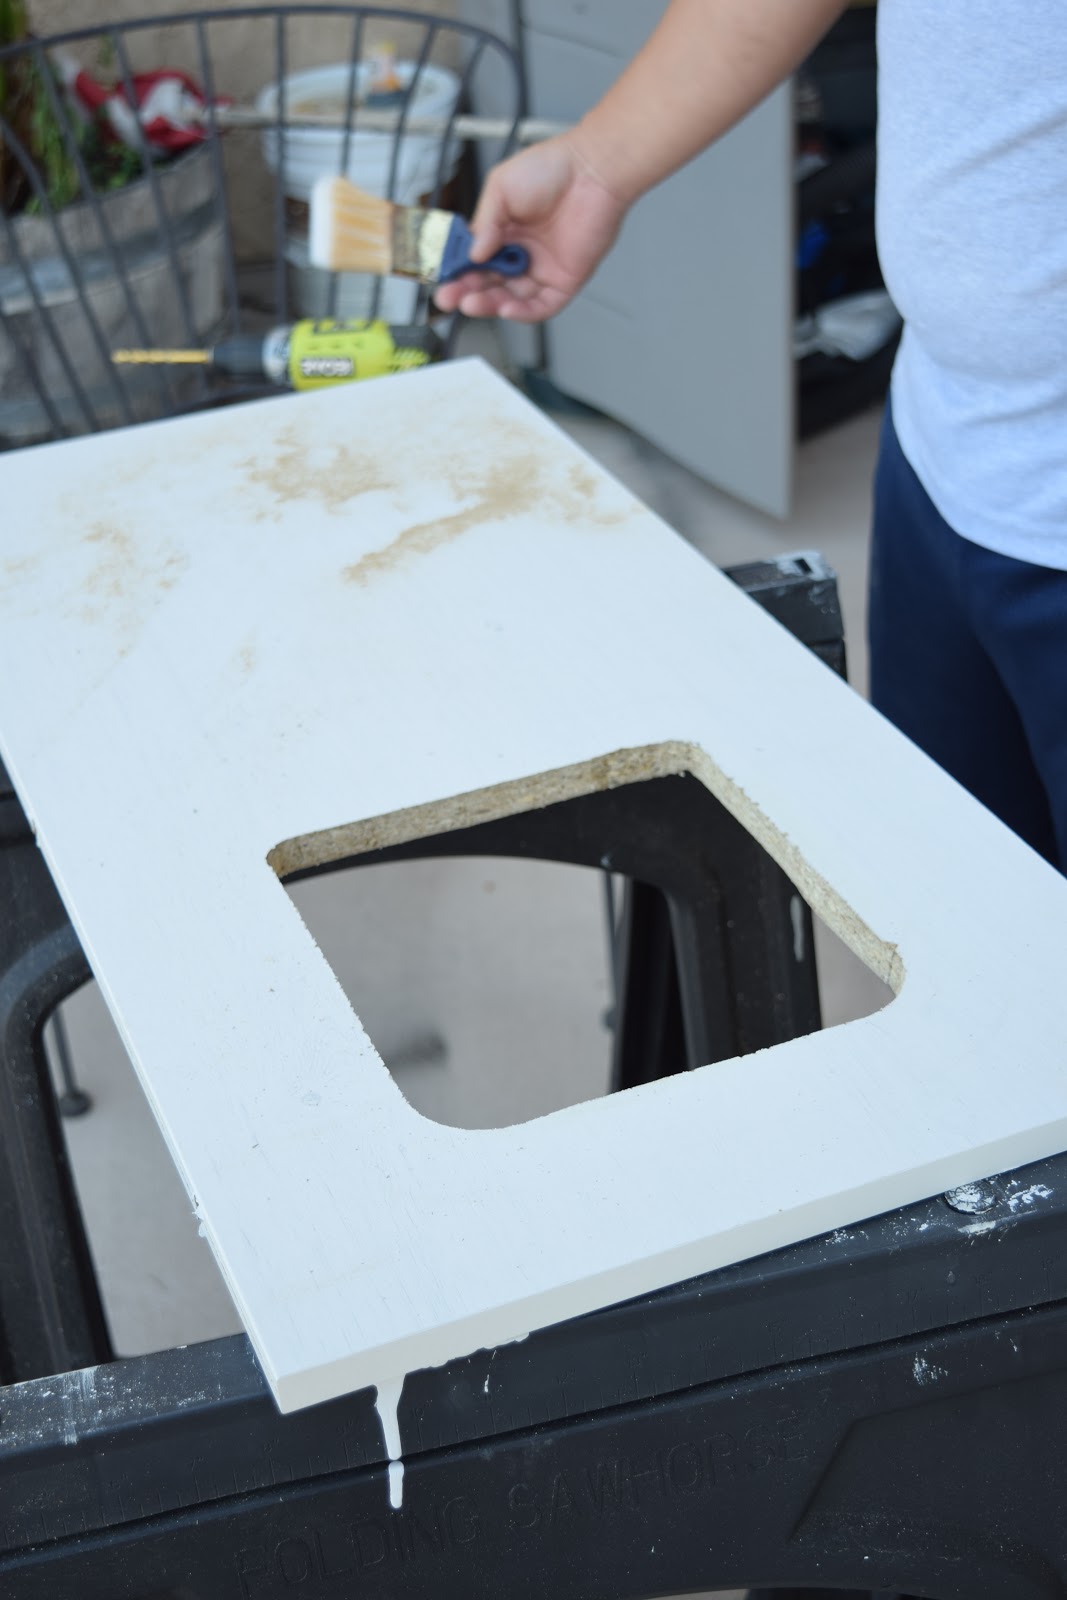
Once the hole was cut all we had to do was install the door. It really couldn't have been more simple and the end result is having me wonder why I didn't think of this sooner!


From the outside - no one would ever know the litter box was inside! Would you have guessed?


And in case you're wondering what that thing was peaking out from under the cabinet...

It's our robot vacuum - the Neato - or what we call her, Flo! I was able to plug the docking station into an outlet behind the cabinet and the docking station fits perfectly underneath with just enough clearance for Flo to make her way back home to charge.


This super simple Ikea hack really helped contain and conceal our messy litter box while also making our home safer for babe! Do you have something in your house that needs a little concealing - printers or electronics come to mind! Could an inexpensive Ikea hack help you too?

Of course it can!

*affiliate links used

Wednesday, July 5, 2017

Our Most Expensive House Purchase Yet

This post has been sitting in my drafts since last September and I'm just now getting around to posting it. Talk about slow

I shared a little bit about our decision to replace these windows in our 6 month post purchase check-in but I finally found some time to throw a few pictures your way so you could see how the whole process unfolded last September.

.
.
.

When we purchased the house we learned during the inspection that what we were calling the “sunroom” was once a covered patio that led out onto the massive deck. Someone, at some time, enclosed the patio in favor of extra square footage and an indoor laundry. It was at this time that the black sliding doors you see below (3 sets of them), we’re installed. 
The inspector wasn't sure when the conversion happened or how old the original windows really were. There wasn't a permit on file for the change but he was able to determine that enclosing the sunroom was definitely an alteration to the original builder plans because only one other unit in our complex has an enclosed laundry room like ours. So when we purchased the condo, all we knew going in was that the windows hadn’t been replaced since and that they were definitely showing signs of age. We loved it anyway.
Within the first few weeks after moving in one of the handles on the middle slider broke off completely and the one on the right was barely hanging on by a thread. We tried finding replacement handles at several different hardware stores and quickly realized that our handle size wasn’t standard. Awesome.
Another clue that these babies were old!
The other issue we noticed was just how bad the window fogging was.

We knew that the windows were foggy from the initial home inspection reports but I don’t remember it being as bad as you see in these pictures when we toured the house. I think a few damps nights/mornings made it worse over the short time we had been in the house and perhaps when we viewed the house during the day, it was less noticeable.

After living with the foggy windows for almost 6 months, and totally hating them, we decided to dedicate almost half our renovation budget towards replacing them. It took some re-arranging and re-prioritization of our to-do list but in the end we thought that having new (read: not foggy) windows was more important to us and to the resale value of the house.


Having never replaced windows before, we decided to cast a wide net and got 6 quotes. When we got the pricing back I was shocked at how widespread the range was...8k-34k - ouch that hurt!

Our original intention was to retrofit the sliding doors with new but upon further inspection, we discovered that the original sliding doors were never framed correctly and there was never any type of water barrier/flashing installed to prevent water leakage to both the inside of the house and to the windows themselves (another indication that this project was never permitted - it would've never passed!).

After discovering this, we were forced to completely re-frame / insulate from the studs which immediately tore our budget to shreds. Over time the window seals broke down and because the windows weren’t properly sealed water/moisture seeped in and forever fogged our windows. A crappy way to spend so much money! We settled on a contractor, gave them our left kidney, and endured a 2 month lead time…until our windows finally arrived last September.

The team was clean, courteous, and quick! They prepped their work area both inside and out with rosin paper and laid down drop cloths to prevent tracking any dirt/debris all over the house…something I was very grateful for!

After breaking away the stucco on either side (which was extremely loud BTW), they made quick work of the old windows – removing each door one by one with a giant suction cup.


And then they moved on to remove the tracks/frames...


Once the doors and frames were removed, it was crazy to have the whole backside of the house opened up to the outside! SO.MUCH.SUN.


With the old doors and frames removed, they began framing for the new ones. Just look at that view!


By mid afternoon, they were ready to install the first new window making sure to waterproof as they went along.


By the end of the day, all the new windows were in!
We chose to go with a white frame on the inside to make the sunroom feel larger and to not obstruct the view as much.

All this happened back in September. Here's the new, improved, and very expensive after:


 What do you think? Were the new windows worth the investment?