Showing posts with label Home Depot. Show all posts

Friday, April 10, 2015

Upcycled Resin Coasters

Last summer my boyfriend and I took a quick weekend trip to Las Vegas and while we were there we stayed at the newly renovated SLS Hotel which was once the Sahara Hotel many years ago. When we went last summer the hotel had only been open for a few weeks and while it wasn't on the main stretch of Las Vegas Blvd among all the hub-bub, or an uber fancy hotel at that, for the price, we weren't opposed to staying somewhere new and decided to give it a shot.

For those of you that don't know, because I certainly didn't, the SLS is a boutique style hotel with hotels in any major cities around the country such as Beverly Hills and Miami, and as of last summer, Las Vegas. What I didn't know about the hotel brand, but thoroughly enjoyed, is that their mascot is a super cute monkey. All throughout the hotel room they had notepads, laundry bags, pens, all adorned with their monkey mascot. How very cute and chic all at the same time.

All weekend long I snapped pictures of the hotel décor (all bloggers do this right?), the chandeliers, the bathrooms, the monkey paraphernalia, and by the end of the short stay, I had fallen hard for this monkey. Weird, I know. He was totally cute (and he's totally a he), while still being very chic and gave off that Hollywood Regency vibe which I totally love. As we were packing up and as our weekend was ending, I desperately wanted to bring a little piece of the SLS back home so I gathered up all the free monkey emblazoned notepads, pens, and laundry bags. Yes. Yes, I totally did. #dontjudge

My boyfriend...the man I love so much because he doesn't even bat an eye as I'm greedily shoveling all the monkey trinkets into my bag, points at the mini bar and says "you forgot the coasters". Coasters!!! Holy jackpot Batman! I snatched those up in a hot second and man...I'm sure I did! They're the shining star of today's totally rad DIY that I schemed up.


Since our trip to the SLS last summer I've been hoarding these coasters like they were gold just waiting for the perfect opportunity to use them some way, somehow. I refrained from using them right away because I knew that with them being made out of the same material as your standard cheap-o bar coasters, they'd be ruined and water stained in no time. If I wanted to keep them intact, I'd have to brainstorm up a more permanent solution.

My ah-ha moment came after perusing the aisles of Home Depot. I've always been fascinated with resin for its clear yet solid finish but have always been a little hesitant to give it a try. Until now! I knew that using resin to seal, protect, while still being able to enjoy the adorable monkey figure on the coasters was the perfect permanent solution I was looking for. I picked up some resin (this kit actually) and gathered the rest of my supplies. Luckily I had everything else I needed on hand so the upfront cost was minimal.

Here are all the supplies I used to complete this project:


I decided that the monkey coasters needed some additional backing...mainly to beef it up so that the painters tape had something more to adhere to. My original thought was to back them with cork, and I still might do that, but I couldn't find any plain cork coasters that didn't cost an outrageous amount of money (seriously...it's only cork people!) and I was too impatient to order something online and wait for it to arrive. #patience is not a virtue
My solution came during my recent coffee table organizational effort. I found these old Halloween themed cardboard coasters which were water stained and instead of tossing them, I knew I could use them to beef up my cutie monkey coasters.


To adhere the Halloween coasters to the monkey coasters, I used Aleen's tacky spray glue and sprayed a good amount on the Halloween design (the backside is just plain white) then just placed the monkey coaster, monkey side up, right on top of the glue and allowed the glue to take hold.


After the glue had taken hold, I wrapped each coaster with blue painters tape. I did wrap the coasters in such a way that there was an overhang of tape on the bottom of the coaster that I then folded down. The painters tape will act as a barrier for the resin and allow the same to take form.


Next, I mixed up a batch of resin according to the directions on the box. All kits may vary so follow the directions on the kit you have before moving on to the next step.

With the resin mixed, I placed all my coasters on a cookie sheet in case there was any leakage and poured the resin into each form. I did my best to make sure each coaster was the same thickness but it was hard to be accurate so I just eyeballed it. While I poured the resin a few air bubbles formed at the top of the surface but the directions in the kit suggested blowing lightly on the surface to eliminate the bubbles.


Once the resin was poured the hardest part was waiting the full 24 hour cure time before I could see how they turned out!
After waiting the allotted cure time, they were almost done! To finish them off, I took a fine grit sand paper and lightly sanded the edges to get rid of the inconsistencies of height from my pour.
Ready to see how they turned out?

The resin changed the color of the coaster over all from a creamy white to an almost coffee stained brown but I don't mind. I love it so much more! We keep the coasters in this ceramic jar that sits on our coffee table. Perfect for easy access!


So we've determined that they look good, but do they work good?

They do! As the glass sweats, the coaster collects the water instead of it spilling over onto the table. I'm so happy with this little DIY and so glad I snagged those free coasters from the mini bar!
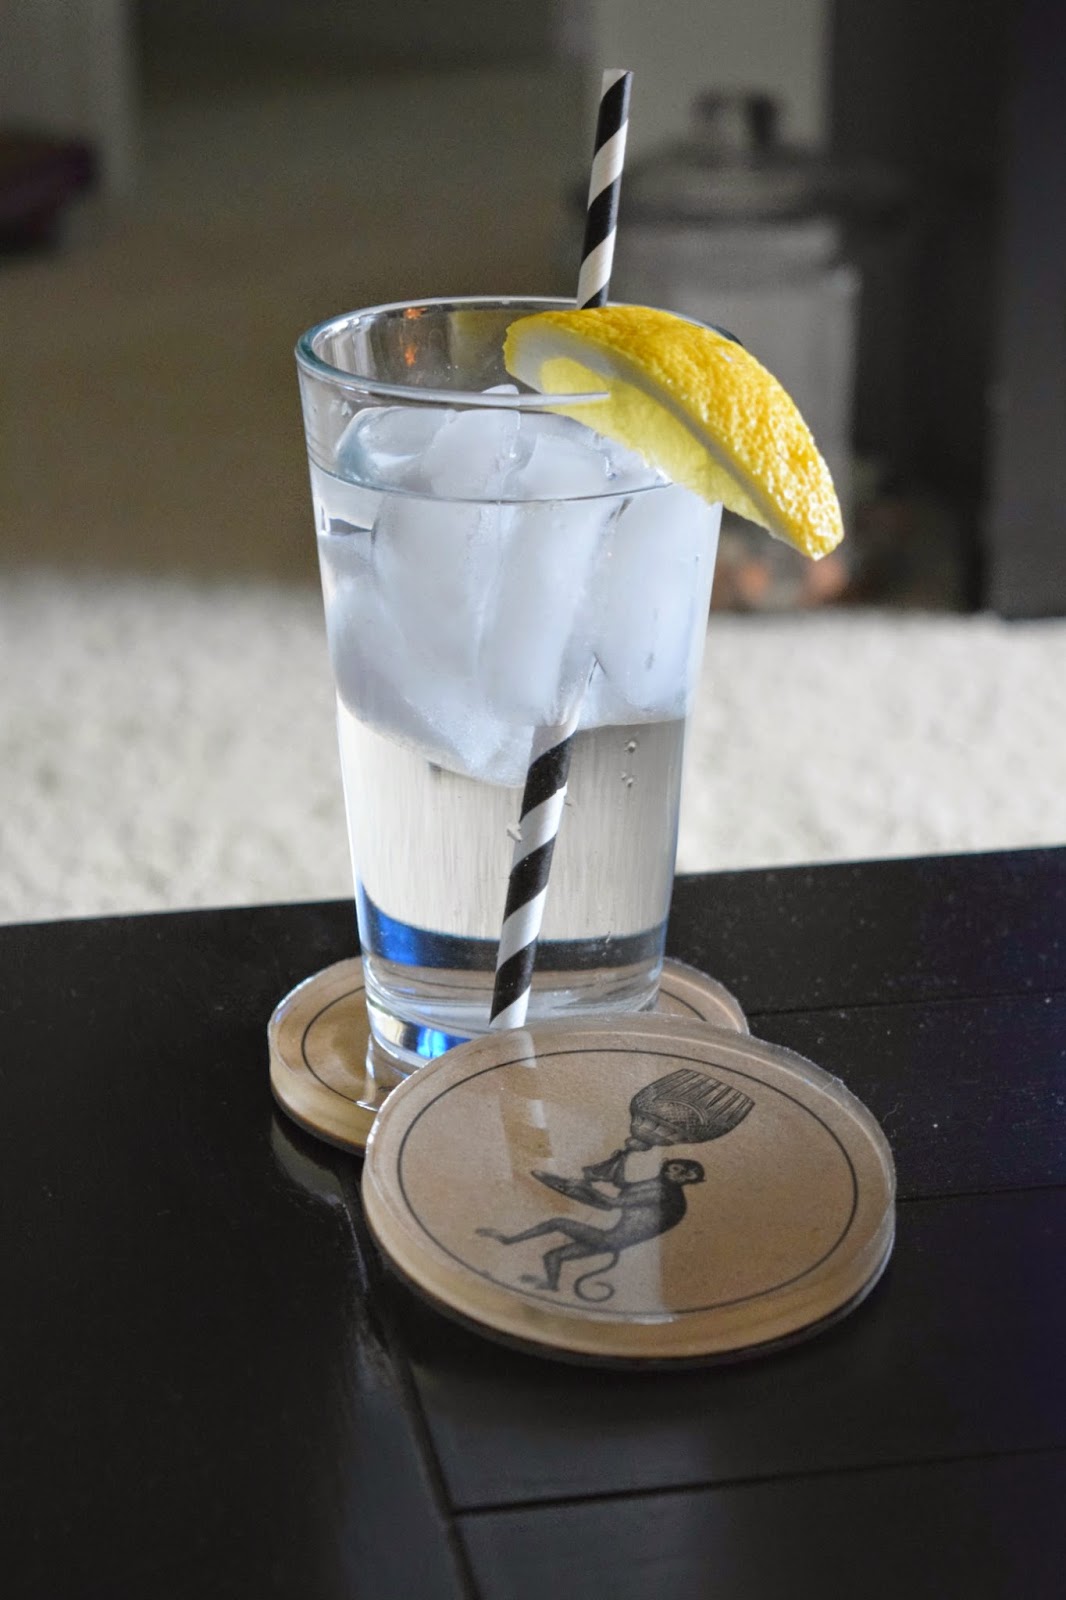

Isn't my little monkey friend the cutest?


Pretty simple right? Now....what else can I use resin for?! Decisions, decisions.


Monday, February 9, 2015

Curbside Pick-Up

One of the things I love most is finding something old and dilapidated, adding a little love, and turning it into something beautiful. I found this beat up table sitting on the curb outside my neighbors house and couldn't scoop it up fast enough. I didn't necessarily need a table but who doesn't love free? It's amazing how many people discard great pieces of furniture on the curb or by the dumpster because they're a little worn and what I like to call "loved" but you can bet that if we're driving by and I spy a good piece that's been set out, I'll make my boyfriend turn around and pick it up! #dumpsterdiver

When I rescued this this little beauty from the trash truck it was in sorry shape. It had some pretty bad water damage on top, the Queen Anne legs looked like they had been chewed on by a dog or cat, parts of the table top had been spray painted but with the exception of the raised lip on top, it was solid wood!

 
Since this table had been sitting who knows where for who knows how long (it was probably living in a dungeon somewhere, lets be honest) I started by giving the tabletop a good sanding with my palm sander. I started with a coarse 80 grit sandpaper and worked my way to a 220 fine grit sandpaper to get all the finish off. Going over with fine grit sand paper on your last pass before stain really opens up the pores of the wood and makes it super smooth and ready to absorb the stain. Since I was planning to stain the top, the top needed to be sanded down to the bare wood. The wood top was veneer so I had to be careful not to sand through the veneer but enough to get the clear coat/stain all the way off.
 
I used the Black + Decker Mouse Detail sander for this project and it worked great to get into all the grooves and crevices.
  
 
Before I stained the top though, I flipped the table over, removed all the screws that connected the skirt to the tabletop so that I could prep the skirt and legs for paint. (Sorry, no pictures of this)
 
Since I wasn't planning to stain the legs, I didn't bother sanding those down to bare wood with the palm sander. With the curvature of the legs it just would've been a pain in the neck and it just wasn't worth it. So, to prep the legs, I grabbed a piece of sandpaper and gave it a light sanding  just to get all the gunk and dirt off and then used Elmer's paintable/stainable wood filler to fill in all the dings and gouges. Pieces of the skirt were a bit damaged and separating from itself in places so I used a little wood glue and clamps to fix it right up.
 
After the wood glue and wood filler had dried, I gave the legs a good sanding until they were smooth and primed it with Zinsser Bulls Eye 1-2-3 Plus spray primer. Let me just tell you, this primer rocks! This is my go-to primer whenever I'm working on a paint project because it has a thick coverage and goes on flawlessly. It's always good to prime a piece you're planning to paint because primer gives the paint something to adhere to and it'll prevent your paint from cracking, peeling, and it'll make your paint job last 10x longer. So even though it's an extra step, it's totally worth it in the end...the last thing you want to do is skip the primer and then have to re-sand your wood and start all over because your paint didn't stick the first go around. Been there, done that! #notfun
 
Once the legs had been primed, I noticed a whole new batch of dings, dents, and gouges so I made one more pass with the wood filler, let it dry, and gave it another good sanding until the legs were smooth to the touch. Even if you don't have to make a second pass with the wood filler, you should always lightly sand your piece after it's been primed. Doing so will ensure a super smooth surface for your paint and sand out any drips that may have occurred while priming. One thing about white primer or paint is that it really does bring out any imperfections so even though that meant I had to wood fill the legs twice, I was happy that the primer helped me see what I didn't the first go-around.
 
When all that was said and done, I sprayed the legs using Rust-Oleum's White spray paint in a Satin finish. You can choose to either brush on your primer & paint but for the smaller jobs, spray paint was easier and faster. Once the legs dried, I reattached them to the top and it was time to stain the top!
 
To begin staining the top, I wiped everything down with a clean cloth and made sure there was no leftover dust from the sanding. I conditioned the wood using  Minwax Pre-Stain Wood Conditioner. Conditioning the wood isn't necessary but doing so preps the wood to absorb the stain just as using a fine grit sandpaper does. The conditioner helps ensure even coverage of your stain and helps to prevent any blotchiness of light and dark patches. And again...if you went through all this trouble to sand the wood, why not take the extra step?!
 
 
The wood conditioner looks like milk in the can so don't be alarmed. I just used a cheap-o paint brush I picked up in the stain section that is specifically made for staining applications but you can use an old cloth too. Old white t-shirts work great for this! Brush on the wood conditioner and wait the allotted time per the instructions. Once you have let your conditioner soak in, white off any excess. You can kinda see in the picture below the slight white tint the conditioned part of the table vs. the raw natural wood. 
 
 
Do this at least twice while waiting the allotted dry time per the instructions on the back of the can and now you're ready for stain!
 
For stain, I chose to use Mixwax Wood Finish stain in Dark Walnut. It looks a little light in the sample but goes on super rich and beautiful. I let my tabletop dry overnight and then began staining the top in the same manner I described above. Brush or wipe on, let sit, and wipe off. Don't forget to wear gloves when staining, otherwise your hands will be stained for like week. This happened to me and it looked like my fingertips had turned black. Gross!
 
When staining, the longer you let the stain sit the darker the stain will be once you wipe it off. And if you aren't sure, wipe off the excess stain after the instructed time and you can always go over it again with another coat. I think I ended up doing 3 coats of stain before the color was where I wanted it to be. Also! Be sure to stain outside or in a well ventilated area that is free of dirt and debris. Stain is super stinky and while your stain is drying, you don't want a rouge leaf to stick to the wet surface and ruin all your hard work!
 
 
Once I was finished staining I let the tabletop dry for 2 days. It probably wasn't necessary to let it dry for so long, but better safe than sorry.
 
After the stain has dried, it's time for the last step! Clear coat & protecting all your hard work staining! I used Minwax Polyacrylic. The polyacrylic goes on the same way as the wood conditioner and stain. Brush, wipe, dry. Repeat. At least 3 times! Once you've applied and let all your coats dry, your table is...Done. Done. Done!
 
I went the extra step and distressed my table legs a little by taking some sandpaper and sanding some inconspicuous areas and the raised edges to give it that worn and rustic look that I love so much before clear coating my legs.
 

  It didn't take much but this free little table went from beat up and discarded, to a welcome addition to our house! It cost me $45 in materials to get this table in useable shape, but in all actuality it cost me less because with the exception of the paint, I still have more than half of everything else left to use on other projects in the future. So for a $45 investment, I think its well worth it for a solid wood table that I can now comfortably seat 6. Did I mention how pretty she is?!


Project Cost:
Table - $0 Fr-eeeeee!
Spray Primer (2 cans) - $10.00
Spray Paint (2 cans) - $8.00
Wood Conditioner - $13.00
Stain - $5.00
Polyacrylic - $9.00
 
Total Cost - $45.00