Last summer my boyfriend and I took a quick weekend trip to Las Vegas and while we were there we stayed at the newly renovated SLS Hotel which was once the Sahara Hotel many years ago. When we went last summer the hotel had only been open for a few weeks and while it wasn't on the main stretch of Las Vegas Blvd among all the hub-bub, or an uber fancy hotel at that, for the price, we weren't opposed to staying somewhere new and decided to give it a shot.
For those of you that don't know, because I certainly didn't, the SLS is a boutique style hotel with hotels in any major cities around the country such as Beverly Hills and Miami, and as of last summer, Las Vegas. What I didn't know about the hotel brand, but thoroughly enjoyed, is that their mascot is a super cute monkey. All throughout the hotel room they had notepads, laundry bags, pens, all adorned with their monkey mascot. How very cute and chic all at the same time.
All weekend long I snapped pictures of the hotel décor (all bloggers do this right?), the chandeliers, the bathrooms, the monkey paraphernalia, and by the end of the short stay, I had fallen hard for this monkey. Weird, I know. He was totally cute (and he's totally a he), while still being very chic and gave off that Hollywood Regency vibe which I totally love. As we were packing up and as our weekend was ending, I desperately wanted to bring a little piece of the SLS back home so I gathered up all the free monkey emblazoned notepads, pens, and laundry bags. Yes. Yes, I totally did. #dontjudge
My boyfriend...the man I love so much because he doesn't even bat an eye as I'm greedily shoveling all the monkey trinkets into my bag, points at the mini bar and says "you forgot the coasters". Coasters!!! Holy jackpot Batman! I snatched those up in a hot second and man...I'm sure I did! They're the shining star of today's totally rad DIY that I schemed up.

Since our trip to the SLS last summer I've been hoarding these coasters like they were gold just waiting for the perfect opportunity to use them some way, somehow. I refrained from using them right away because I knew that with them being made out of the same material as your standard cheap-o bar coasters, they'd be ruined and water stained in no time. If I wanted to keep them intact, I'd have to brainstorm up a more permanent solution.
My ah-ha moment came after perusing the aisles of Home Depot. I've always been fascinated with resin for its clear yet solid finish but have always been a little hesitant to give it a try. Until now! I knew that using resin to seal, protect, while still being able to enjoy the adorable monkey figure on the coasters was the perfect permanent solution I was looking for. I picked up some resin (this kit actually) and gathered the rest of my supplies. Luckily I had everything else I needed on hand so the upfront cost was minimal.
Here are all the supplies I used to complete this project:

I decided that the monkey coasters needed some additional backing...mainly to beef it up so that the painters tape had something more to adhere to. My original thought was to back them with cork, and I still might do that, but I couldn't find any plain cork coasters that didn't cost an outrageous amount of money (seriously...it's only cork people!) and I was too impatient to order something online and wait for it to arrive. #patience is not a virtue
My solution came during my recent coffee table organizational effort. I found these old Halloween themed cardboard coasters which were water stained and instead of tossing them, I knew I could use them to beef up my cutie monkey coasters.


To adhere the Halloween coasters to the monkey coasters, I used Aleen's tacky spray glue and sprayed a good amount on the Halloween design (the backside is just plain white) then just placed the monkey coaster, monkey side up, right on top of the glue and allowed the glue to take hold.

After the glue had taken hold, I wrapped each coaster with blue painters tape. I did wrap the coasters in such a way that there was an overhang of tape on the bottom of the coaster that I then folded down. The painters tape will act as a barrier for the resin and allow the same to take form.


Next, I mixed up a batch of resin according to the directions on the box. All kits may vary so follow the directions on the kit you have before moving on to the next step.
With the resin mixed, I placed all my coasters on a cookie sheet in case there was any leakage and poured the resin into each form. I did my best to make sure each coaster was the same thickness but it was hard to be accurate so I just eyeballed it. While I poured the resin a few air bubbles formed at the top of the surface but the directions in the kit suggested blowing lightly on the surface to eliminate the bubbles.

Once the resin was poured the hardest part was waiting the full 24 hour cure time before I could see how they turned out!
After waiting the allotted cure time, they were almost done! To finish them off, I took a fine grit sand paper and lightly sanded the edges to get rid of the inconsistencies of height from my pour.
Ready to see how they turned out?

The resin changed the color of the coaster over all from a creamy white to an almost coffee stained brown but I don't mind. I love it so much more! We keep the coasters in this ceramic jar that sits on our coffee table. Perfect for easy access!

So we've determined that they look good, but do they work good?
They do! As the glass sweats, the coaster collects the water instead of it spilling over onto the table. I'm so happy with this little DIY and so glad I snagged those free coasters from the mini bar!
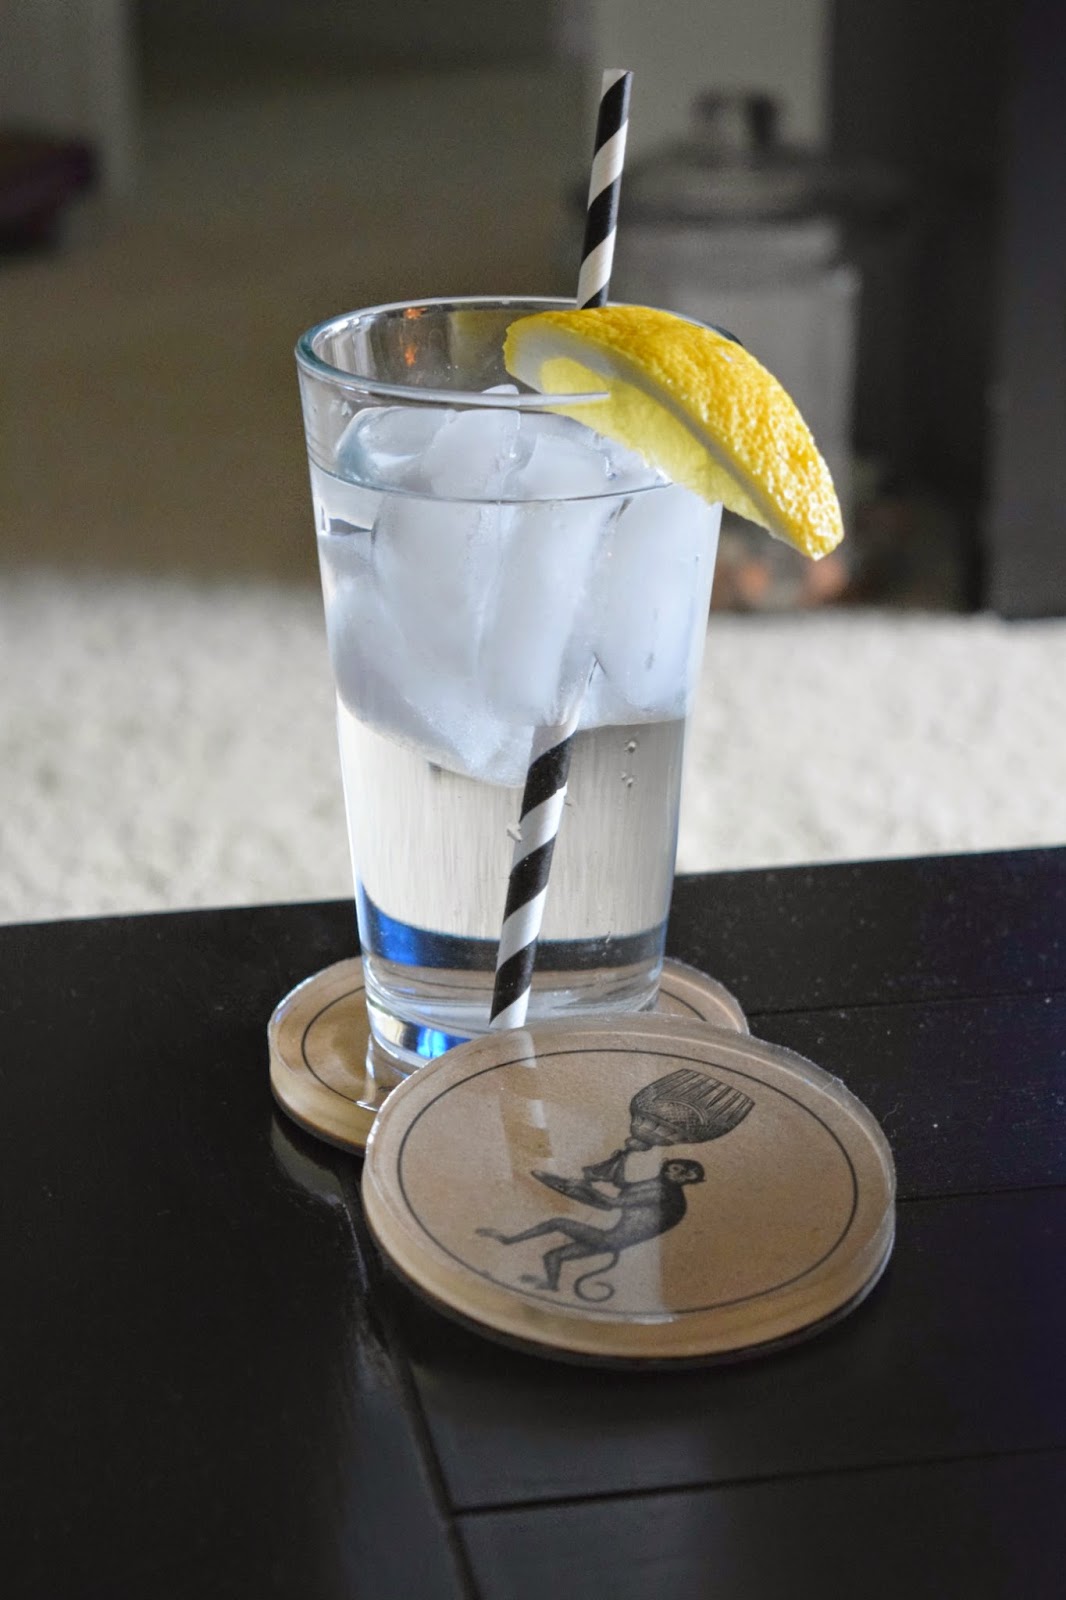
Isn't my little monkey friend the cutest?

Pretty simple right? Now....what else can I use resin for?! Decisions, decisions.


No comments:
Post a Comment