Showing posts with label progress report. Show all posts

Wednesday, October 19, 2016

A Whole House To-Do List: UPDATED

Hey guys!

Remember way back in March when I shared our first whole house to-do list? Basically it was a way for my overactive brain to keep track of all we still needed/wanted to do in one organized place. Plus, who doesn't love crossing things off a to-do list for an instant "maybe you haven't been binge watching Netflix as much as you thought" little pick-me-up?! 

After running down all we've accomplished (or lack thereof) in our first 6 months of homeownership, today I wanted to drop back in with a good ole updated list for you. Plus...with baby on the way, I've been getting rather anxious and overwhelmed with all we still need to accomplish before SHE (helloooo awesome gender reveal...#NOT) makes her grand entrance. 

Being that this is a living, breathing list, and we've lived here a while and are a bit more clear-headed about what we need/want - I've streamlined it a bit...added/removed to/from it here and there...and threw in some progress shots while I was at it.

Let's dive right in, shall we?

 
Whole House
  • Remove tile / carpet and replace with flooring everywhere
  • Install new crown molding
  • Trim out all doors and windows
  • Install new baseboards
  • New hardware throughout
  • Paint! And paint some more!
                                                                           Entryway 
  • Create storage for coats, jackets, bags - hooks?
  • Add board & batten? Picture frame trim/molding
  • Paint interior of front door & add decorative trim
  • Add art
  • Find flush mount light fixture (and install)
  • Find vintage (ish) runner
  • Create "drop zone" at end of entry
  • Find larger mirror for "drop zone" area
                                                                          Living Room 

  • DIY / have cabinet built to house TV - add electrical for TV/media components
  • Style built-in
  • Get black/white rug professionally cleaned
  • Find 9x12 rug to layer under current rug
  • Replace ceiling fan
  • Install in-ceiling audio speakers
  • Sell old coffee table / buy new coffee table
  • Bring in additional seating
  • Bring in additional lighting
  • Add art above couch
  • Case out opening on the right
  • Close off door on the left
Dining Room
  • Replace chandelier - buy or DIY
  • Relocate junction box for chandelier
  • Remove vertical blinds
  • Install curtains + bamboo shades
  • Rug or no rug? (we chose to rug, but I'm not sure)
  • Find head chairs
  • Replace original aluminum window
Kitchen 


  • Remove upper cabinets along the stove wall (Phase 1)
  • Paint cabinetry (Phase 1)
  • Add hardware (Phase 1)
  • Find a vintage rug (Phase 1)
  • Add a bamboo shade (Phase 1)
  • Pimp out pantry (Phase 1)
  • Replace counter tops (Phase 2)
  • Remove prep sink (Phase 2)
  • Add pot filler (Phase 2)
  • Custom vent hood (Phase 2)
  • Tile stove wall (Phase 2)
  • Install open shelving (Phase 2)
  • Buy all new appliances (Phase 2)
Master Bedroom

  • Sell old headboard / buy new
  • Refinish nightstands / add different legs
  • Close off 2nd doorway
  • Reconfigure closet
  • Remove mirrored closet doors / add full height doors (DIY?)
  • Install curtains + bamboo shades
  • Find rug (vintage?)
  • Dresser?
  • TV or no TV?
  • Add additional recessed lighting / overhead lighting
  • Widen current double door entry
  • Update slab double doors
Master Bath

  • Complete master bath resurfacing - new floors, paint, vanity, tile...etc.
  • Install new light fixture
  • Install new toilet
  • Replace original aluminum window
  • Add shower door
  • Install open shelving
  • Remove towel bars - install hooks instead
  • Update all slab doors in this area
 Bedroom #2: Little Lady
  • Update slab door
  • Update closet doors / reconfigure current closet system
  • Paint inside of closet a fun color
  • Install curtains + bamboo shade (roller shade?)
  • DIY floating shelves opposite of bed wall
  • Hanging chair maybe?
  • Add overhead lighting
  • Buy daybed? Refinish bed in storage?
  • New bedding, rug, etc... (inspiration here)
  • Bring in a fun accent color
 Bedroom # 3: The Nursery
  • Update slab door
  • Purchase / install French doors for large opening
  • Remove mirrored closet doors / install (DIY?) full height doors?
  • Reconfigure current closet system
  • Paint inside of closets a fun color
  • Add overhead lighting
 Guest Bath
  • Update slab door
  • Install new toilet
  • Complete guest bath "resurfacing" - new floors, tile, vanity
  • Purchase new vanity - install
  • Remove old tub insert - install new
  • Purchase new mirror
  • Remove medicine cabinet
  • New lighting
  • Remove towel bars - install hooks instead
Hallway between Bedrooms 2 & 3
  • Replace old electrical panel
  • Update thermostat
  • Purchase / install flush mount fixture
  • Find runner (vintage?)
  • Add a gallery wall of pictures to hallway?
Sunroom
  • Wood wrap beams
  • Replace faulty windows
  • Create a workstation / desk area
  • Fill with plants
  • Add additional overhead lighting
Laundry Closet
  • Replace water heater
  • Stack washer/dryer
  • DIY counter top for folding/sorting
  • Add hanging rod
  • New cabinets - or reuse kitchen uppers
  • Create a place for the kitty litter
 Deck

  • DIY wrap around couch
  • Purchase BBQ
  • Install astro turf
  • Buy new patio furniture

So much still to do but looking back on these pictures, makes me realize just how far we've come in less than a year. New floors, new windows, bigger, better trim...it already feels like a whole new house! Don't you agree?

Monday, September 19, 2016

A 6 Month Check In + House Progress

September marks 6 months in the new house. In many ways it feels like we’ve lived here forever…we’ve settled into a nice routine and the house is basically liveable…but the construction tools in every nook and cranny and the constant layer of demo dust somewhere in some room, reminds me that we’re still not there. We’re close. But no cigar.

I feel like it’s taken us every last bit of these last 6 months to be at a place where I can finally say that the end is near…or at least for Phase 1 it is. In all honesty…there are times when I feel like we’ve come so far but then I see what other bloggers are doing in the same time frame and I get so discouraged that we haven’t accomplished a whole lot more. The comparison game is no joke.

Instead of letting it get me down, I have to remember that we both work full time outside the home and house related projects are essentially non-existent during the week. It’s hard enough to get dinner on the table (or ordered) at a decent hour with softball season in full swing around here while trying to maintain a respectful noise level in the evening so as not to upset all our neighbors. Throw in an exhausted pregnant lady (me) and you can bet that I’m either in bed or have fallen asleep on the couch by 8 pm. So over the last 6 months, we’ve been weekend warriors - just tackling what we can, when we can - and while 6 months is a long time to get a whole lot done, we’re moving a little slower over here and I’m OK with that.

I realize now that I didn’t really blog about what our initial thoughts and plans were for this first phase of our renovation journey, other than posting this monster long to-do list, but I think a lot of that had to do with just being overwhelmed by the sheer volume of stuff we wanted to do, what we envisioned for this house, our time / budget constraints, and not knowing where to start or what to do first.

Today I thought it would be fun to look back on the last 6 months and recap what we started and where we are today, but first…a little bit about our Phase 1 wish list and how much money we had to work with.

After the sale of our house we were left with a small amount of money (about 15k) to put towards the renovations and immediately had to decide what was most important to us and how to stretch the money we had as far as it would go. We knew that we wanted to upgrade the kitchen and both bathrooms but felt that we could do a lot of “whole-house updates” with the money we had rather than pouring that money into a single room...because we all know how quickly 15k can go in a kitchen renovation. We figured that the kitchen and bathrooms would benefit from some easy to-do aesthetic changes and could hold off for a full scale reno, down the line.

In the end, we decided to spend our money by…

Removing all the tile / old carpeting in the whole house: 


And replacing it with new laminate flooring (about 1500 sq ft in total): 


We replaced both toilets with these Kohler beauties (because other people’s butts = gross):


We painted / are in the process of painting the entire house (walls, trim, moldings, doors, etc.):


We closed off a doorway for better flow and visual sight lines in the living room:


And widened our master bedroom entry while we were at it:


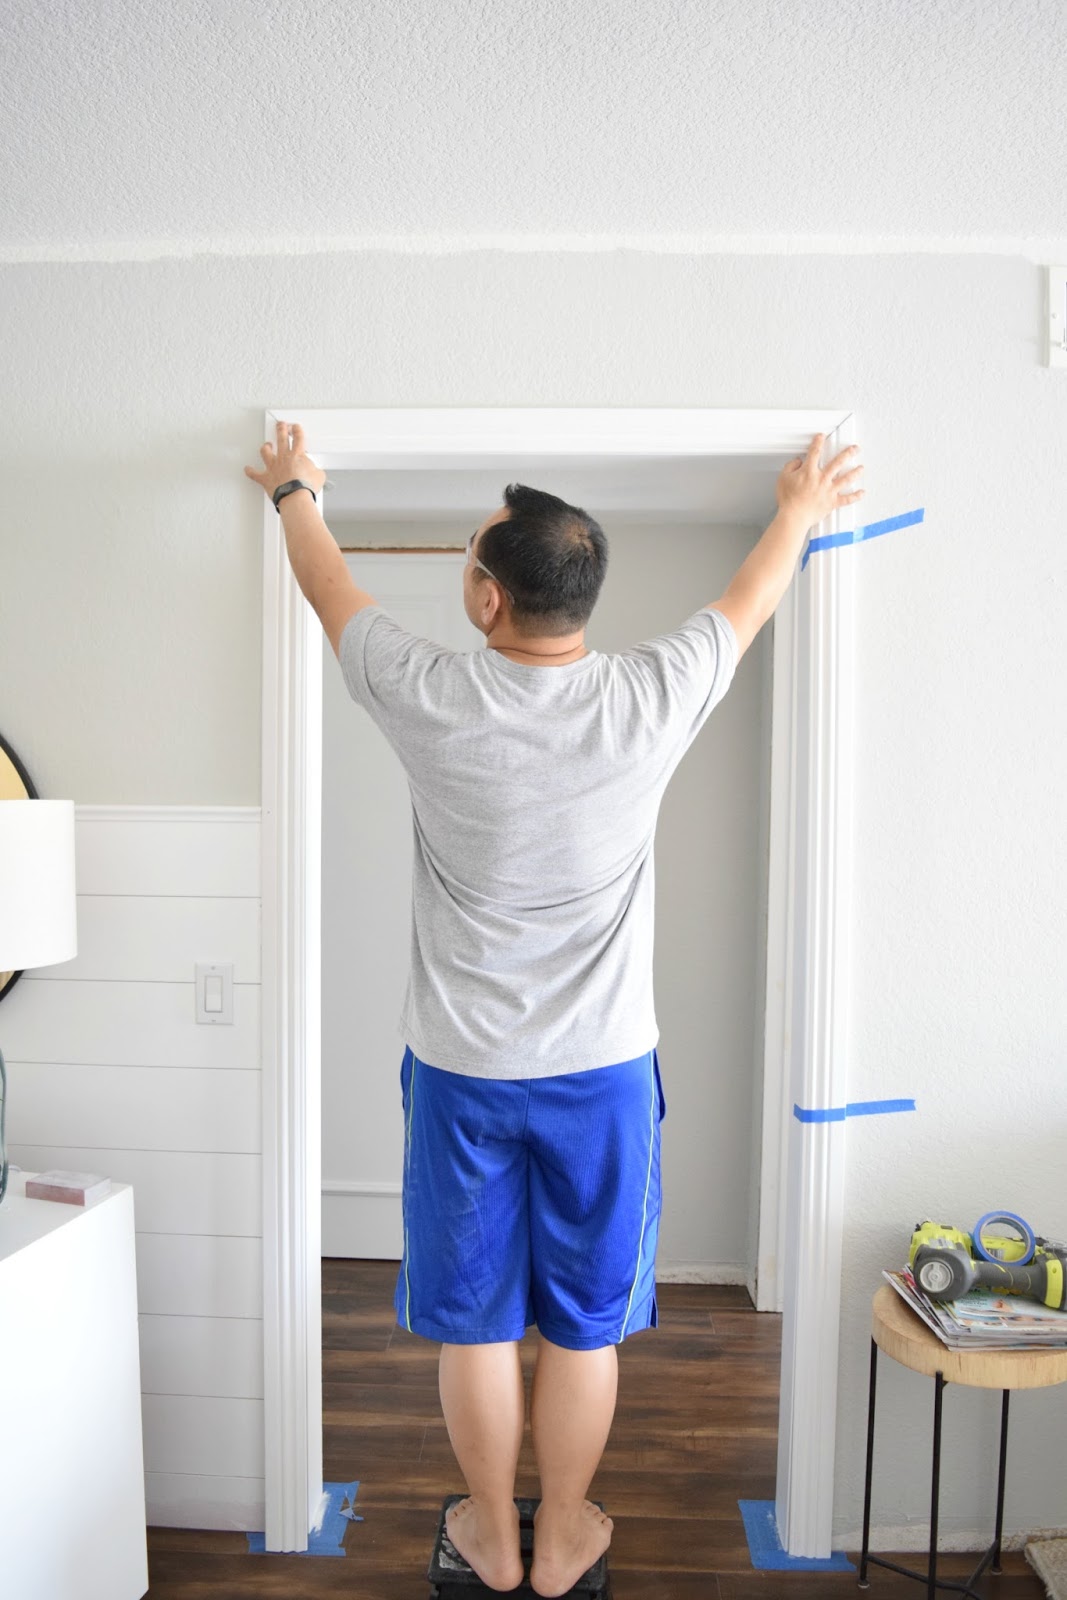
We added interest to all our plain/boring flat paneled doors with decorative molding:


We installed new oil rubbed bronze hardware throughout:


And beefed up all the trim and baseboards (still to come) throughout the house:


We created a faux cased opening:


Gave the entry way a much needed update with lots of added interest (more on this soon):


Added a new entry way light fixture:


The front door hardware got upgraded too and the inside got a molding treatment of its own:


Replaced an outdated ceiling fan:


And treated ourselves to a life-changing robot vacuum:


In boring news, we upgraded the thermostat and our main electrical panel after a fire hazard was noted on our home inspection report:


And the biggest expense of them all…these bad boys (3 sets of sliding doors) were replaced just this past weekend due to the foggy glass you see in the picture below:


So what didn’t get accomplished / won’t get accomplished during this phase of renovations that we had hoped would get accomplished?

1.      Reconfigure / expand the master bedroom closet

2.      Add semi-custom wall of built-ins in the living room

Why? Simply put…we ran out of / are running out of money. Aside from the ceiling fan and the robot vacuum, everything else mentioned above, including the master bedroom closet reconfig and built-ins were in the initial plan and budgeted for. What we didn’t know, and/or realize going in was how much replacing those window were going to cost. Not having ever replaced windows before, after some preliminary Internet research and some rough estimates, we budgeted almost half our budget. In the end, the quote came back several thousands higher than we anticipated mainly due to some additional work that was discovered and had to be done during install because the previous set of window were installed incorrectly. How they passed inspection the first time around is beyond me. What a crappy way to spend a bunch of money! But in renovations, these kind of set-backs are par for the course. To course correct, we took a step back and re-evaluated our list half way through and cut the above 2 line items out of the itinerary to get us back on track financially.

Going forward, we’ll modify our plans for the custom built-ins and will most likely go the pre-fab/DIY route to achieve our end goal down the road but it’ll be on a much smaller budget. As for the closet…I’m waffling back and forth on what I want to do / what can be done so it’s probably good we didn’t go full steam ahead with the initial plans anyways until there's a solid plan in place.

All in all, I feel like we’ve accomplished a lot, albeit at a much slower pace. I do want to mention that everything we’ve done up to this point has been paid for by us and done by us (plus help from my Dad too – hey Pops!). Some bloggers are fortunate enough to work with great brands and have formed amazing partnerships to afford them some really awesome perks, kickbacks, products, etc…but this little blog hasn’t reached that status, nor do I know how to go about soliciting such awesome incentives. Plus it’s important to me that you all know that I’m trying to be as honest and transparent about how we’re doing things around here both physically and financially.

Anyways! That brings you up to speed with everything we've managed to accomplish over the last 6 months we've lived in the new house. I have a lot of post coming for a lot of the projects you saw above for the first time so be on the lookout for those! First up tomorrow...the long awaited entry reveal!

Monday, June 6, 2016

Progress Report: The Entry

Hey guys! Remember me?! Life and work has been crazy-busy and it’s kept me away from the blog a little too long but I’m back at it and here today with a little update post!

It’s been a few weeks since we jumped into our entry project and we've been making great progress. Aside from painting and a few remaining items (art, rug, etc.) needed to round out the space, we’re just about ready for a reveal! How exciting is that?!
But before we get to all the progress, let’s rewind back to the beginning…mmmkay?

This is what the space looked like before we got started:


And here’s the to-do list that we were working with:

To-Do:
1.      Create storage for coats, jackets, bags – hooks? Slim wall mounted shoe storage?
2.      Add board & batten? Picture frame trim/molding?
3.      Paint interior of front door & add decorative trim
4.      Add art
5.      Install a flush mount light fixture
6.      Find a vintage runner
Let’s run down the check list and see where we stand after launching into this project a few weeks ago:

#1 – Create storage for coats, jackets, bags – hooks? Slim wall mounted shoe storage?
ü  Check! I decided to go with hooks because as you may have seen in my post about the entry plans, they just make life easier. The hooks haven’t been hung but they’re in possession of my grubby little hands!
#2 – Add board & batten? Picture frame trim/molding?

ü  Check! We ended up going with neither but decided to plank both walls on either side of the entry…with a twist! We still need to finish prepping and give the walls a couple coats of paint but we’re thiiiiis close to being finished. I have high hopes for this little entry of mine!
#3 – Paint interior of front door & add decorative trim


ü  Check! Door has been painted but trim still needs to be added and then given a secondary coat for a seamless look. Did we go black or a deep navy blue? Can you tell in these pictures? 
#4 – Add art
              Zip. Zilch. Nada.
#5 – Install a flush mount fixture


ü  Check! The first fixture we installed just wasn’t cutting it – the diffuser wasn’t cut correctly and had all sorts of funky gaps between the shade and diffuser and I don’t think it fit the space like I thought it would (rememberit’s ok to change your mind). After striking out the first time, my second at bat was a home run! But all you’re getting is a sneak peak in the photo above :)
#6 – Find a vintage runner

Again with zip.zilch.nada. Finding a runner in the exact size I need has proved to be difficult. I have a temporary one in place for now but the color and size aren't quite right. 

Well...that's it guys! We've been working really hard on the entry, but also taking time to be purposeful in our decisions and choices for this space. I'm happy to say that we're nearing the finish line and that working towards the first completed space in our home has been so much fun too!

Come back tomorrow and I'll be sharing my go-to sources for vintage rugs - probably the hardest item to find to finally, FINALLY, call this space done! Or...however "done" a space could possibly be around here. 


Wednesday, April 6, 2016

A Little Bit of This...

Welcome back to another week of renovation progress over at the casa! 

With most of the major demo (and dust) behind us on Day 1 and Day 2 of this remodel, we could finally turn our attention to things a little more appealing to this DIY-but not manual labor-loving girl. Like paint! And hardware! Pretty things! Gimme all the heart eyed emojis puhlease!


But first: dumping all that construction debris. #boring!
After the floor demo was completed we were left with all the demo debris and no real way to dispose of them. I'm kicking myself because I never took a picture of the giant pile of tile we tore out! Our original thought was to rent a dumpster through our local waste management company but without a decent sized area to park the size dumpster that was recommended, and the weight limitations on the size dumpster our small driveway would accommodate, we had to find another solution.

We contacted the contractor who quoted us $1700 to demo and dump to see if they would be willing to dispose of the material for us but they weren't interested (I don't blame them). After running into dead end after dead end, we started inquiring with companies that specialized in large item disposal. 

We had one company out and got an estimate upwards of $600 to haul away all our debris and at that point we were beginning to second guess our decision not to hire the whole thing out for $1700. But if I've learned anything so far in this entire renovation process, it's to never take the first quote and always shop around!

So we did.

The 2nd company that we called out quoted us $500 right off the bat. Seeing as they were already cheaper than the first company, we were willing to consider them. We asked if they would take $400 (it never hurts to ask), they said they couldn't but would do it for $465. S and I both gave each other a look, not wanting to wait any longer to get rid of this junk, so we said "DEAL"!

They got to work right away and as we watched them for a few minutes, we started to feel bad that they were out there sweating in the hot sun tossing our junk. Plus - throwing tiles down below into the bed of their truck looked super fun too! 

So we put on our work gloves and decided to lend them a hand. With the 4 of us it only took about 30 minutes to get all the debris loaded up in their big red truck.


After we had everything loaded they let us know that we had nearly 3 tons worth of material. Wow! I'm glad we decided to hire these guys instead of trying to haul this by ourselves! The best part? Because we lent a hand and saved them some time they decided to pass the savings onto us and we ended up paying $400 after all! #allinaharddayswork


When all that demo mess was finally GONE it was full steam ahead to painting. You may have seen here in this Instagram post that we tested out some different grays on the wall and you guys! The right gray is so hard to choose (more on that in a future post).


Once we I eventually decided on a color and I slapped on a coat of paint in the main living area over the course of a lazy afternoon. Still haven’t decided on paint for any of the bedrooms, bathrooms, or sun room. Indecisive party of one?

See that white bit of wall down at the bottom? The result of the best decision ever! Because we're installing new baseboard and crown means no cutting in! Makes painting almost enjoyable. #isaidalmost


After our little painting party I turned my attention to the interior doors. They were in rough shape and just your typical builder grade slab doors – totally unfancy. And in total need of some attention.

We didn't exactly have a whole lot of extra money (read none) in the budget to outfit the entire house with all new doors (that actually matched) so we DIY-ed our way to what will be some fabulous looking doors. #ifidosaysomyself


Here’s a little sneaky peak:
 

Then when all the fun was over we got schooled in all things "home owner". See that guy there? With that fancy saw thingamajig? Yeah...he's cutting out our soggy drywall that resulted from an upstairs leak. Cool. And mold? Real cool.


And that about brings you up to date on the home-reno front. Things have been slow moving this last week but we did manage to install a new toilet. And it was equal parts gross and hilarious! We're chipping away at that to-do list little by little each night but there's still a whole lot of not-so-fun things to tackle before the fun stuff can begin.

Living in a construction zone is starting to take it's toll. Living without any furniture, TV, any real kitchen stuff has forced us to get creative. Have you been here too? How did you survive? Suggestions welcome and WANTED!

More on that later. Till next time...

Thursday, March 31, 2016

Demo Day 2

Welcome back!

If you're tuning in today we're picking up where we left off yesterday and I'm back with another progress report on Day 2 of demo which I promise will be a lot less dramatic. Or not.

To refresh your memory - and mine - here's what the place looked like when we moved in:


And here's where we left off at the end of Day 1:


After waking up with a much better attitude, a renewed sense of determination, and a body that was surprisingly not as sore as I expected, we still had 1/2 of the hardy backer to demo and we also needed to remove all the hardy backer screws (all those little dots in the foreground of the above photo). Can you say #overkill?


Demoing the remaining hardy backer only took an hour or so and when we were finally finished, we started sweeping up the bits and pieces of thin set (leftover from the tiles) in preparation for our most tedious task yet...removing all.those.screws!


All 8 million of them:


We had a few options to remove them: use an angle grinder and shear off the screw head (I didn't like the sparks), use a crowbar and rip them out (I didn't like the splintering the wood doing this), or dig out the thin set in the screw head and drill them out.

We went with the latter. Mainly because I'm an OCD crazy person. So we spent the next few hours using our Dremel to clean out the screw head and used our Ryobi Drill to pull them out. 


One would Dremel and the other would drill and after a few hours, all the screws had been removed. It was by far the most absurd and time consuming method to remove the screws, but after the physically demanding work of demo Day 1, it was a welcomed change of pace. We turned on Pandora, worked in small sections, and got-er-done!


So much better! 


See that blue bucket above? We decided to use that bucket for all the screws we removed just to see how high we could fill up. Whoever laid the hardy backer went #buckwild with screws so we knew going in, there'd be a lot, but we were still shocked to see that nearly 3/4 of the bucket was filled by the end of the whole ordeal. #insaneinthemembrane


After removing all the screws, we used the shop vac to do a once over on the floors and took the vacuum hose to the perimeter. After vacuuming and putting our tools away, we could officially close the books on our 2nd day of demo. We finished Day 2 on a high note (and with a much better attitude) and guess what?! 

Dad was right. #dadforthewin

We did it. And we were proud of ourselves for doing it.

Not to mention the $1700 savings was a nice little incentive too.

Next week I'll be back to share the progress we've made on the house since the floor demo was completed and there will be a few more tutorials coming your way too! We're closing off a doorway, widening another, we finally chose a paint color, and we're one step closer to laying our floors. Things are happening so fast around here...follow along on Instagram so you don't miss a thing!